Showing posts with label rubber stamps. Show all posts

Monday, May 11, 2015

Field of Poppies - Sande's view


Sande here with you today showing a card 
I have made by using this gorgeous image by
  Ching Chou Kuik called "Field of Poppies".

Isn't she just FABULOUS!!! 
I have colored her with Copics.

 You can find this Beauty at the Sweet Pea Stamps store 
as a digital and as a rubber stamp.  

There is much more fabulous images at Sweet Pea Stamps so don't forget to pop over!
Hope you'll get some inspiration here and create something great!

Don't forget to come back every day and see other DT's outstanding creations!
Hugs, Sande xx

Sunday, May 3, 2015

Margaret Fae - Jane's View

Sweet Pea Stamps

Today is my day to showcase and image from Sweet Pea Stamps and I have chosen to work with the beautiful image Margaret Fae by Amanda S Byron which is available from the Sweet Pea Store as a rubber stamp.  I have to admit this is not the sort of image I colour but oh what fun I had :) :) :)

To begin with I coloured the image with Faber Castell Polychromos colouring pencils.
 Next it was onto the card, this week I am making an easel card.  My first job was to find a suitable paper to work with.  I don't buy much in the way of design papers preferring wrapping paper and sheet of hand made paper.  I also have a few sheets of the paper often used to wrap flowers in from the florist and it was in that bundle I found just what I was looking for,  As the paper is very thin I then adhered it to some white card stock.
The sections for my card were cut with Spellbinders Grand Scalloped Circles and Grand Circles.
Keeping to the colour pallet of this card I die cut some butterflies from Spellbinders Les Papillions 2 and I chalked them to match my colouring on the digi wings.
 The sentiment was die cut using Tattered Lace Antique Ovals and I added a pink peel off birthday sticker.  Again the sections were coloured with the same chalks as the butterflies.  Liquid pearls were added to finish off.
 Two of the butterflies were used for the card front and the third I attached to my fussy cut image with a piece of wire so it would appear to be flying in the air.  The image and the butterfly were then attached to the card inside in  way that they can fold flat when the card is closed and then stand up at the front of the card when opened up giving a really wonderful 3D effect.
Using Spellbinders Foliage I cut a couple of leaves out of the scraps I had left over from the circle leaf paper covered sections.  Some green natural fibre mesh, a chipboard bird, bow and pearl spray finished off the front of the card.
 And here is the card opened up


Ingredients:-
  • Image -  Margaret Fae by Amanda S Byron 
  • Colouring Medium - Faber Castell Polychromos colouring pencils
  • Dies - Spellbinders Grand Scalloped Circles and Grand Circles, Les Papillions 2 and Foliage I; Tattered Lace Antique Ovals
  • From my Stash - Liquid Pearls, pearl sprays, ribbon, chalks, green mesh, wire
Thank you for stopping by today and hope you have a happy crafting time ahead of you :) xx

Saturday, May 2, 2015

Mitzi Sato-Wiuff's Bleeding Hearts Sprite - by Angelique

Weeeekenddddd yayyyy
Good morning all, 

I've been workin on my sprite mini album and did the last 2 pages.


MATERIALS: 
Structure paper, design paper, butterfly stamps, brat, corner stickers, distress ink, distress markers/refills, foam tape

On the left side I've placed the coloured image
After layering the papers, I've added the brat, corner stickers and image

Next I've stamped some butterflies on the green structure paper and cut them out
With my embossing stylus I've given the butterflies wings some dimention before placing them on the right page en 1 on the brat on the left page

For more Sweet Pea Stamps, digital or rubber please visit the store HERE

We have a verry nice and friendly group on facebook and we would love to see your make with any of the Sweet Pea Stamps.

I hope you enjoyed my project
See you again next week
Huggsss, Angelique

Sunday, April 26, 2015

Hope - Jane's View

Sweet Pea Stamps

Today is my day to showcase and image from Sweet Pea Stamps and I have chosen to work with the beautiful image 'Hope' by Rebecca Sinz which is available from the Sweet Pea Store in both rubber and digi.

I have not made any of my candles recently and now seem to be on a bing with them.  I did one a couple of weeks ago, this one today and another one in the pipeline which I am trying to do a video tutorial on - that is a challenge in itself lol.  Anyway, here is todays candle :)

So many folks ask how I do these candles hence the trying to make the video but in the meantime I will do my best to explain the basics.  I start by using temporary adhesive spray on a piece of paper about 220gms in weight and then lay the tissue paper over the top doing my best to avoid any wrinkles.  Next I trim the excess tissue paper off so it will run through my printer with no issues.  To prepare my wrappers I use a template I made of the candle sizes I use regularly.  I then browse through my photos to find a suitable background.  For this wrapper I used two images, the sky was a photo I took in the Maldives on my 25th Wedding Anniversay - a fabulous second honeymoon lol, and for the foreground I used a beach scene taken while lying on my belly to get the rocky outcrop.  Next, in Photoshop, I imported the two images and removed the sections I did not want, here it was all the see and sky from the beach photo so I was only left with the rocky outcrop which I thought would be perfect to place the digi on.  Next I removed all the background from the digi so I was left with the equivalent of a .png image which I could then hand colour in line with the Terms of Use of most of the image we use these days.

I use crayons to colour my candle wrapper images as I find they work the best, this one was coloured with Faber Castelly Polychromos
And here is the image fully coloured.
Next I tried something new and tried rubber stamping a gold border, sentiment and a floral design to represent stars.  The sentiment worked fin and the flower stars were not to bad but the border was a disaster.
When working with candles it is imperative to think of fire safety, I would so hate to be the cause of a fire in somebody's home from one of my candles, so I have a couple of produces which are totally safe for decorating.  One is a gold dust and the other is a water based varnish.  To cover up the rubbish gold border I used the gold dust and tried to get a a vibrant distressed look.  This was applied with a soft sponge for the top and then I used a wide paintbrush to sweep around the upper section of the wrapper. To balance the gold out I added some more to the rocky outcrop at the bottom of the candle. Finally a quick layer of the candle water based varnish to add a shine and all done :)


Ingredients:-
  • Image - 'Hope' by Rebecca Sinz
  • Colouring Medium - Faber Castelly Polychromos
  • From my Stash - gold dust, candle varnish and the candle.
Thank you for stopping by today and hope you have a happy crafting time ahead of you :) xx

Saturday, April 25, 2015

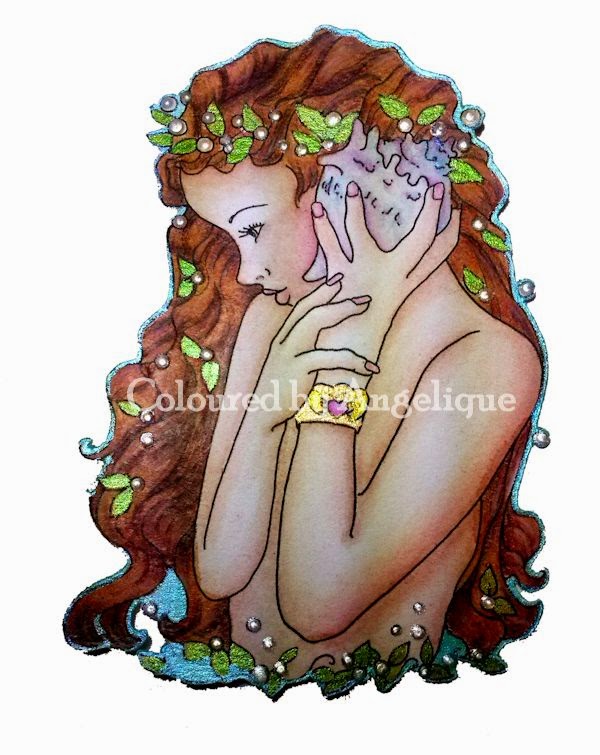
Featured Artists - Joanne Schempp - Erin Irish Mermaid

Good Morning,

For todays inspirational post I've used the gorgeous Sweet Pea rubber stamp
Erin Irish Mermaid by Joanne Schempp

You can find the rubber stamp in shop HERE
and she's also available as digi stamp HERE

I've used a photo frame.
Made the background with inks on tule.
Coloured the image with distress inks, pencils and twinkling h2o's.

MATERIALS:
Photo frame, cardstock blue and creme, tule, ink refills, distress markers, twinklin h2o's, colour pencils, leaves, flowers, sea shell, beaded string.

For more rubber stamps by Joanne Schempp visit the Sweet Pea Stamps shop HERE or
if you prefer digi stamps go HERE

I hope you enjoyed my project

We have a verry nice and friendly group on facebook and we would love to see your make with any of the Sweet Pea Stamps.
See you again next week
Huggsss, Angelique


Sunday, April 19, 2015

Artist Week - Ancient One - Jane's view

Sweet Pea Stamps

Today is my day to showcase and image from Sweet Pea Stamps and I have chosen to work with the beautiful image Ancient One by Joanne Schempp which is available from the Sweet Pea Store in both rubber and digi.
I have not tried mixed media like this before so be gentle with me :) :) I am in awe of some of the mixed media projects I have seen on the web and just could not resist giving it a go.  To begin with I printed my image, well two as I was thinking about having another Joanne Schempp image of the sail ship in the background but had not totally made up my mind.  The idea soon flew out the window and I decided I did not need it.
 Next I raked out a whole load of dies and double cut them using stiff white card.  The dies I used were Tattered Lace Retro Alphabet, Memory Box Splash Border which I cut up into two sections and also used the spiral excess bits of the die and finally Marianne Designs Creatables Anchor.  I also added some Flower Soft and some bead and metal shells.
 I don't have many supplies for this sort of project as not much is available in Saudi Arabia, or a least I have not seen many products around but I do have some white acrylic paint so that is what I used to paint over the background ready for airbrushing with Promarkers later.  Next I coloured the image with just one colour of blue Promarker, trying to build up the colour but using several layers.
 Onto the background, I first masked my coloured image and set to with the airbrushing in two colours of blue, one was Bluebell but I can't remember what the other was lol - afraid I was having to much fun to remember to write down what I had used.
 Next I stippled some PVA glue in areas and then stippled with silver bronzing powder on top. I added lots of Pearl and Silver Liquid Pearls to the digi.
Not quite happy with the digi so using the darker of the two blues I used for the background I added a bit more depth to him.  Finally I added a silver ships wheel charm and three brads. A blast of Crafters Companion Silver Varnish and all done.  This decorated mat was then mounted on a silver mirror card mat, a navy corrugated mat and then a mauve mat. The group was them attached to my navy card blank.
For the inside of the card I used Spellbinders Labels 1 and a Spellbinder embossing folder.  A bit more of the silver bronzing powder and another anchor completed this section.
 And here we have it - a rather funky man card.  For a first attempt I am pretty pleased with myself and most of all I had amazing fun, getting covered in paint and glue I felt like a kid all over again, such a fun day :) :) :)

Ingredients:-
  • Image - Ancient One by Joanne Schempp
  • Colouring Medium - Promarkes, acrylic paint
  • Dies - Tattered Lace Retro Alphabet, Memory Box Splash Border, Marianne Designs Creatables Anchor and Spellbinders Labels 1
  • Embossing Folder - Spellbinders Seashells
  • From my Stash - Silver Bronzing Powder, Liquid Pearls, shells, metal shells, ship wheel charm and brads
Thank you for stopping by today and hope you have a happy crafting time ahead of you :) xx

Sunday, April 12, 2015

Fairy 6, Jane's view

Sweet Pea Stamps

Today is my day to showcase and image from Sweet Pea Stamps and I have chosen to work with the beautiful image 'Fairy 6' by Amy Brown which is available from the Sweet Pea Store in rubber.

 Bit of an experimentation day.  A while ago I made some of my own texture paste using talcum powder, white acrylic paint and PVA glue.  It worked OK and I seem to have loads of the stuff. It has been sitting in a sealed container for the last few months and today I thought I would used it again and try it with an embossing folder.  Alas it had dried out a bit so I poured some Mod Podge in and mixed it up - yummy, great texture and nice and sticky.  Oh dear - a bit to sticky for the embossing folder so that idea was scrapped, it looked good until you lifted the top off the folder and then all the pattern vanished and I was left with some wonderful spiky textures but that is not what I wanted lol.
 Time to rethink.  I smoothed out the paste again and this time tried with a rubber stamp.
 Much better and I did have lots of fun too.
While this was drying it was onto the digi which was coloured with Faber Castell Polychromos
Now I have my colour scheme onto the DP, this was a freebie from a magazine but I have no idea which one as I kept the papers and threw the magazine away ages ago.  Fancying a bit of sparkle I used the same rubber stamp and some Enchanted Gold embossing powder.
With the texture paste now dry I airbrushed it with my Promarkers to match the colours used in the digi.
I fussy cut the digi and oops - brain not engaged.  Overhanging the frame the ends of the wings are a single line with a wee spiral.  The only way I could think to get around this was to chop the spiral bits off but I felt that was not being true to the digi.  My final solution was to attach gold wire and when dry, recreate the spirals.
 Here you can see the finished result of the wire on the wings.
I cut the shape I wanted of the texture paste section and finished it off with lots of gold trim and gold organza ribbon with  bow.
 Next was the sentiment, nice and simple as there is enough going on with the card as it is.
The inside of the card was covered with the same DP as used for the front but I did not heat emboss this.  For the writing section I used the Spellbinder die A2 fancy weave - 4.
The final decoration on the front of the card was some rather funky green and blue netting I found down in the local market.  This was held in place with pearls.  Something was missing so I opted to add another gold embellishment using the die Marianne Design Craftables Flower Border Oval to which I added some Mirror Gold embossing powder and picked out some of the shapes with my gold pen.  Some Micro glitter was added to the wings of the digi.  Phew, done :) :) :) 


Ingredients:-
  • Image - Amy Brown's Fairy 6
  • Colouring Medium - Faber Castell Polychromos, Promarkers and O2 shimmer paints. 
  • Dies - Spellbinders Cirlcles and A2 fancy weave - 4, Sizzix Scalloped Circles and Marianne Design Craftables Flower Border Oval
  • From my Stash - Texture paste, ribbon, pearls and the fish net stuff :)
Thank you for stopping by today and hope you have a happy crafting time ahead of you :) xx

Saturday, April 11, 2015

Mitzi Sato-Wiuff's Wisteria Sprite - by Angelique

Good morning, 
hope everyone had a wonderfull easter

I've been working on my sprite mini album and here are the next two pages using
Another gorgeous Sweet Pea Rubber stamp
You can find her in shop HERE


MATERIALS:
Mini album (diy), cardstock green, design papers, foam tape, distress ink/markers, distress tool, ink pad

Left page


Right page

Wisteria Sprite is coloured with distress ink and markers.
Placed some foam tape on the back, to make her pop out more.

For more rubber stamps by Mitzi Sato-Wiuff visit the Sweet Pea Stamps shop HERE

We have a verry nice and friendly group on facebook and we would love to see your make with any of the Sweet Pea Stamps.

I hope you enjoyed my project
See you again next week
Huggsss, Angelique


Saturday, April 4, 2015

The East Wind's Lucy Loo Mustache - by Angelique

Good morning.

For todays blogpost, I've made a tag using the rubber stamp 
You can find her in  shop HERE


MATERIALS:
Aquarel paper, mask/stencil, 3d glitter paints, relief paste, Inka Gold creme's, washers,
Bister powders, distress ink/markers.


I stamped the image twice.
1 to colour en 1 to use as a mask
First I've cut the tag out of aquarel paper, placed the mask image on the tag and then 
used the Bister powders.
With the mask still on there, I placed the stencil to use with the relief paste.
Took the stencil and mask off and started colouring my image, whilst lettin my tag dry

Once dried, I placed the stencil and mask back on the same place to go over the relief paste(clogs) with the 3d glitter paint.
I rubbed a bit of the inka gold creme's in between the cogs and coloured the mini washers 
with the creme's too.
Glued them into place and let the tag dry again.
Last I placed my cut out coloured image and made a little rope/twine bow at the top


Lucy Loo Mustache is also available as digi stamp and can be found HERE

We have a verry nice and friendly group on facebook and we would love to see your projects with any of the Sweet Pea Stamps.

I hope you enjoyed my project
Wishing everyone a Happy Easter and
see you again next week
Huggsss, Angelique

Monday, March 30, 2015

Altered paper bag for a ballet girl - Sande's view


Hello all you lovely crafters!

Sande here with you today showing a DT creation of mine. 
This time I have made an altered paper bag by using this gorgeous image from
  Katerina Koukiotis called "Ballet de Papillion".

I have colored her with Copic Markers and didn't want to ruin it with many decorations.
 You can find this Beauty at the Sweet Pea Stamps store 
as a rubber stamp and as a digital.  

There is much more fabulous images at Sweet Pea Stamps so don't forget to pop over!
Hope you'll get some inspiration here and create something great!

Don't forget to come back every day and see other DT's outstanding creations!
Hugs, Sande xx