Showing posts with label women. Show all posts

Sunday, February 22, 2015

Featured Artists - Linda BIggs - Jane's view

Sweet Pea Stamps

Today is my day to showcase and image from Sweet Pea Stamps.  As it is Featured Artist Week the whole DT are working with images by Linda Biggs and I have chosen to work with the beautiful image Medicine Woman which is available from the Sweet Pea Store in both rubber and digi.


I have a bunch of design papers from magazines and they just seem to sit there unused so I am making a conscious effort this year to attack the pile lol.  With that in mind my first step was to choose my backing paper and then colour my image around those colours.  With that done I used a peel off birthday sticker in white and airburshed it with my Promarker, one of the colours used in the image.  I should add the image was coloured with Promarkers and I chalked the background. The sentiment was, once dry, placed on some of the DP used for the background and then die cut.
To finish off the card I used a Dreamcatcher die from Cherry Lynn which I airbrushed and Sizzix  - Ornate Hanging Sign.  The sentiment was cut with Xcut tags. a lace border was added along the bottom edge and a bow tied with the same lace and then airbrushed with my Lilac Promarker.  Finally, some pink Stickels on the dreamcatcher and pearls picking out the three main colours, pink green and blue.

Ingredients:-
  • Image - Medicine Woman by Linda Biggs and available from Sweet Pea Store in both rubber and digi
  • Colouring Medium -  Promarkers
  • Dies -  Dreamcatcher die from Cherry Lynn,  Sizzix - Ornate Hanging Sign and XCut tags
  • From my stash, lace, pearl brads, blue gems and Stickles
Thank you for stopping by today and hope you have a happy crafting time ahead of you :) xx

Monday, August 4, 2014

Alien, Jane's view

Hi folks, it is my turn again to showcase an image from the Sweet Pea Stamps store, this time I have chosen Joanne Schempp's Alien.  As I am using this card as a One Sweet Challenge example I followed the theme of this months challenge - Turn Up The Heat, how about popping over and joining in :) :)

To begin with I printed the image three time, one on card for colouring and the other two to used for masking while I airbrushed the background and red planet.
 Next I coloured the image with Promarkers.  I have deliberately left the ground very pale as I did not want this to represent cold which needed heating up from the red planet, one of the takes on the theme, the other take being 'Hot Stuff' as she is rather a hot woman hahaha.  To finish off the image I used clear embossing powder on the head piece and band accessories just to add a bit of texture.
 I do love lace on a card and although this is a card made for a bloke and lace is not really their thing I do think it provides the texture to the black base card and as most of it will be covered with the image and border I think any block will just accept it and not feel it is to girly :)
To finish the card I added black line sticker to edge the image.  For the border I used the Sizzix - Deco Floral Bead die.  The text was cut using the Tattered Lace - retro alphabet die.  A few black glitter self adhesive dots were added too.

Ingredients:-
  • Digi -  Joanne Schempp's Alien
  • Promarkers
  • Dies - Sizzix - Deco Floral Bead die and Tattered Lace Retro Alphabet
  • Lace, black line sticker and black self adhesive dots from my stash
Thank you for stopping by and hope you have a happy crafting day ahead :) xx

Monday, July 7, 2014

Holly Bow by Jane

Sweet Pea Stamps

Hello folks, here I am again with another creation for  Sweet Pea Stamps.  Today I am sharing with you my DT creation using the digi Holly Bow by Karen Middleton.

To begin with I cut two holly leaves with my Merry Christmas sentiment and daughter/SIL names.
Next I fancied something plush so used some sticky back red velvet I bought from some strange back street <g>.
After printing the digi I coloured with Promarkers.
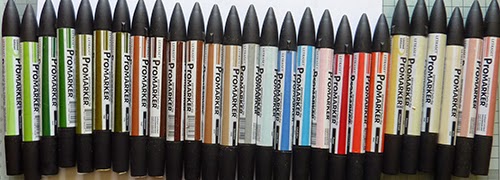
Promarkers used
I used Spellbinders Adorning Squares as my die and then airbrushed the background with Forest Green Promarker
Now to emboss a mount and then cut with Spellbinders Grand Squares
Time to make the bow to attach the tag sentiments to.
And here we have the finished creation.  You can see I also added some red lace, pearls and a couple of wee holly leaves with berries as well.

Ingredients
  • Digi Holly Bow by Karen Middletonavailable from Sweet Pea Stamps
  • Dies - Spellbinders Adorning Squares and Grand Squares
  • Promarkers
  • Lace, velvet, leaves, ribbon, pearls, line stickers and beads from my stash
Thank you for stopping by and happy crafting time is wished for you :) :) :) 

Monday, June 30, 2014

Enchanted Christmas

Sweet Pea Stamps

Hello folks, here I am again with another creation for  Sweet Pea Stamps.  For this creation I am using Enchanted Christmas by Joanne Schempp.

To begin with I placed the digi onto a photo I have taken in a forest down under and printed.
 Next I coloured the digi with Promarkers and added Stickles to some of the areas.
 Using green glitter card I cut out a mini tag using a Sizzix - Square Scallops and added a Merry Christmas sentiment and my daughters name in peel off stickers.
 Out with the Christmas box to find some suitable ribbon for my bow which I finished off with a red sequin and a pearl.
 Promarkers used to colour the digi
Now for the die cutting.  The green glitter card, gold mirror card and digi were cut usingSpellbinders Grand Circles and Grand Scallop Circles

With all my sections prepared it was time to assemble
 And here is the finished card for my daughter.

Ingredients
  • Enchanted Christmas by Joanne Schempp
  • Dies - Spellbinders Grand Circles and Grand Scallop Circles; Sizzix - Square Scallops
  • Green Glitter card and Gold Mirror Card
  • Stickles
  • Ribbon, pearl, peel-offs, green/gold mesh from my stash
Thank you for stopping by and hope you have a happy crafting day ahead or you :) :) :)

Monday, June 2, 2014

Behold the Lamb Katerina Koukiotis - Jane's view

Sweet Pea Stamps

Hello folks, here I am again with another creation for  Sweet Pea Stamps.  Today I am sharing with you my DT creation using the digi Behold the Lamb by Katerina Koukiotis

I am still on my family Christmas card mission and this one is for my Mum :)

I started off by colouring the digi in my Mum's favourite colours, blues and mauves.  Once coloured I fussy cut her (the digi that is, not my Mum hahaha)
 Promarkers used to colour the image
Next I cut some blue stiff paper to form the cascades in my Tri-Fold Cascade card.  I plan to use just blue and gold for the background folds so on one section on each side I used my rolling pin and a snowflake embossing folder.  By doing it this way I can control where the embossing is.
Next I dapped over the top with gold stamping in.
On another section I used gold embossing powder - it look a bit messy here but the end result on the card is what I was after.
I covered the base of the card with the same blue stiff paper that I used for the cascades and then, using adhesive spray overlaid with some semi transparent and gold swirl wrapping a friend gave me which was the wrapping on some flowers she was given.  Yep, my friends are pretty good a passing all their bits of wrapping etc. onto me :)
 I have been playing around using metal sheets and dies, I love the effect of the metal.  Here I have used gold metal sheet and the Crafty Ann Flourish-5 die.
 Final bit to do before finishing off was the bow.  Using ribbon to match the blues and mauves in the digi colouring and metal wire to hold the bow tight I did not want to waste the ends so wrapped the wire bits around a toothpick to make spirals.
 And here we have the finished card.  I have used gold line stickers around the front edge and a peel off sentiments.  Three gold flowers were also added, they came from another friend who found them attached to a box of chocolates that somebody had brought into work.  A fair bit of recycling going on in this card :) :) :)
Side view
 Front view

Ingredients
  • Digi Behold the Lamb by Katerina Koukiotis available from Sweet Pea Stamps
  • Dies - Crafty Ann Flourish-5 die
  • Promarkers
  • Ribbon, flowers, peel off stickers, material and embossing powder from my stash
Thank you for stopping by and hope you have a happy crafting day :) :) :) 

Monday, May 26, 2014

Featured Artist with Jane

Sweet Pea Stamps

Hello folks, here I am again with another creation for  Sweet Pea Stamps.  This week is Featured Artist week.  The whole DT are creating with images by Rebecca Sinz and I have chosen to use the fabulous digi Gardenia.
To begin making this card I first designed and die cut the font panel.
 Next I coloured some lace with my Promarker.
 The lace was attached to the back of the die cut lattice front and also the inside of the card as part of this will be visible in the end design.
 Liquid Pearls which I applied on each of the cross sections of the lattice.
 While the Liquid Pearls were drying I colour the digi with Promarkers
I then mounted the digi onto Mulberry paper which I had used the water method to created a frayed edge.
 Now onto the flowers - grrrrrr - what grief.  I wanted white flowers so first tried with copy paper but that looked flat, then tried with hand made paper, that looked great but not white enough.  Time to put the thinking cap on - ah!! white Mulberry paper.  Perfect colour and so delicate in appearance but with this fine paper pretty fiddly to do.  I used Spellbinders Bitty-Blossoms-6.
Next I used Spellbinders Nestabilities-Labels-20 for the inside of the card.  This was edged with Derwent Blendable crayons and Promarker.
 I assembled all sections of the card and added some luscious green leaves to accompany the hand made gardenia.  Here we have a view showing the inside of the card
and here is the front of the card showing how the lattice panel is held in a curved way, locked in place by the gardenia and leaves at the side.
Thank you for stopping by :)

Ingredients
  • Digi -  Gardenia by Rebecca Sinz available from  Sweet Pea Stamps
  • Die - Spellbinders Bitty-Blossoms-6 
  • Promarkers
  • Liquid Pearls
  • Lace, mulberry paper, leaves and gold peel off line stickers from my stash
Thank you for stopping by and have a wonderful crafty day :) :) 

Monday, May 19, 2014

Serenity by Concetta Kilmer - Jane's creation

Sweet Pea Stamps

Hello folks, here I am again with another creation for  Sweet Pea Stamps.  This week I am working with the beautiful digi 'Serenity' by Concetta Kilmer

To begin with my first personal challenge was to attach black hair.  I so often get this very wrong by trying to over blend using 5 grey colours plus black.  This time I decided to try something a little different - black, plus ice grey 5, 3, and 1 (Promarkers).  All the colouring was done in the greys and then I used the black with the fine nib to build up the black.
 With that done, time to colour the rest of the digi.
Phew, - eyes need a rest now lol.  OK - better and coffee drunk so back to crafting.  I started on the card base where I plan to use black card, olive green paper and black lace for a rather sexy look hahahaha
 Card put together now for the embellishing. I have mixed together gold and clear embossing powders, I don't want a solid gold but just a sprinkling.  This will be used on the butterfly which I cut with Spellbinders Les Pavilions 2.

Here is the butterfly - black for the base layer and the top layer coloured with olive green Promarker.  Both sections finished off with the gold and clear embossing powder mixture.
 A few more bits and bobs needed, Stickles, peel off sentiment (not sure if I am using gold or colouring a silver one in greens yet), ribbon and of course a tag which I have been making as I go along with the other sections.
 All done.  I finished off the inside of the card with cerise paper cut with Spellbinders Grand Labels 1and a rubber stamped butterfly which I painted with Stickles lol.
 And here we have the finished card :)

Thank you for stopping by :)

Ingredients
  • Digi -  'Serenity' by Concetta Kilmer
  • Promarkers
  • Die - Spellbinders Les Pavilions 2, Grand Scallop Ovals, Spellbinders Grand Labels 1 and Scalloped Circles 
  • Promarkers
  • Stickles
  • Lace, backing paper (wrapping paper), and ribbon from my stash
Thank you for stopping by and hope a happy crafting time is heading your way: