Showing posts with label Plate #60. Show all posts

Sunday, December 1, 2013

Kym's Weekly Post

It is start of another month and therefore time for another challenge over at One Sweet Challenge.  

This month the topic is "A Gift in Itself" ie maybe a card like a present or a gift card or an actual gift item you can give to someone.
  
Here is the gift item I have made - a gift for a friend to put on their Christmas tree:

 I decided to make a decorated bauble for the tree.  I have used the Ching-Chou Kuik image called "Holly Fairy".   It is available as a digital stampsingle rubber stamp and as part of a multi-image plate (Sheet 21, Plate 60 - Holly Fairy comes on the multi-image plate with Poinsettia Fairy, Holly Night and Cherish Christmas).  The image has been coloured in with my Graph'it pens and I have inked around the edge with Tim Holtz's Peeled Paint distress ink.

For the chipboard bauble I first added gesso.  I then tore up some Christmas tissue paper a crafty friend gave me last year into pieces and used watered down PVA to stick the tissue paper onto the bauble.  Once dry I used a texture stamp by Sheena Douglass around the edge and all over the back of the bauble - well you can't leave the back messy in case the bauble swings around on the Christmas tree!!
Here is a close-up of the image by Ching-Chou Kuik.  Isn't she stunning?

I have finished the bauble off with some hanging thread, wooden bow which I have coloured with my red Graph'it pens, cheesecloth, die-cut holly and some gems as the berries.
***************************************
Here is a card I have made using a Sweet Pea Stamps image called "Serenity" by Concetta Kilmer.  This image is available as a rubber stamp and also as a digital stamp.  

I have coloured the image in with my Promarkers/Flexmarkers and highlighted areas with my Pan Pastels.  I have kept to a summery yellow colour scheme.  

The backing papers are from what I have been given.  Around the image I used various See D's stamps to add some detail.  I die-cut Tim Holtz's butterfly die and then coloured it with two shades of yellow Pan Pastel.  I have finished the card off with gems, satin edged organza ribbon, die-cut sentiment, die-cut butterflies and some flower buttons (yes these are buttons which I have taken the shank off and filed down the rough edge).

Sunday, November 24, 2013

Featured Artist Week: Rachel Anderson

It is Artist of the Week time over at the Sweet Pea Stamps Blog.  This month the Artist of the Week is Rachel Anderson.  All members of the Design Team use a Rachel Anderson image and make a card/creation with it.
For my Artist of the Week card I have chosen Rachel Anderson’s image called “Sunrise”.  It is available as a digital stamp, single rubber stamp and as part of a multi-image plate (Sheet 2, Plate 111 – Sunrise comes on the multi-image plate with Amanita Muscaria, Pixie Dust and Twilight Shimmer).

I have coloured my image in with Graph'it pens and highlighted areas with my clear Wink of Stella pen.  I have die-cut around the image and used a set of peg pens of flowers and leaves and stamped around the image.  I have used a yellow Pan Pastel to colour around the image.
The backing papers I have used are from my Perfect Companions CD.  I have finished the card off with some lace, ribbon, crochet flowers a friend made, buttons, Craftwork Cards die-cut sentiment and a butterfly made out of air dry clay coloured with two tones on yellow Pan Pastels.
 ********************************
Here are some other cards I have to show you this week.

 As Christmas will soon be here I decided to make a Christmas card using the Sweet Pea Stamps image by Ching-Chou Kuik called "Holly Fairy".  It is available as a digital stamp, single rubber stamp and as part of a multi-image plate (Sheet 21, Plate 60 - Holly Fairy comes on the multi-image plate with Poinsettia Fairy, Holly Night and Cherish Christmas).
 
I have coloured the image in with my Promarkers/Flexmarkers and then inked around the edge with Tim Holtz's Crushed Olive and Peeled Paint distress ink.  I have added Glossy Accents to the holly berries.

The backing paper is a freebie from a magazine last year.  I have mounted the image on a Marianne Designs die-cut frame.  I have finished the card off with some ribbon threaded through the holes, die-cut flower cut from tissue paper and held together with a brad, Marianne Designs die-cut holly, Craftwork Cards die-cut sentiment and some pearls.
********************************

Here is another holly Christmas card but something totally different.  This time I have used a Rebecca Sinz image called "Holly".  She is available as a digital stampsingle rubber stamp and as part of a multi-image plate (Sheet 12, Plate 236 - Holly comes on the multi-image plate with Hemlock, Witching Hour and Dragon Angel.
I have coloured the image in with my Graph'it pens.  The backing papers I was given.  Due to the expense of posting cards I am trying to keep the height of cards to a minimum so it doesn't cost people a lot to post.  I have therefore embellished with some washi tape, gems,  Craftwork Cards die-cut sentiment and made a flower out of tissue paper with a brad centre and red Stickles rubbed over it (messy but very effective).  

Sunday, November 3, 2013

One Sweet Challenge - November 2013

It is the first day of the month and therefore time for another challenge over at One Sweet Challenge.  This month the topic is "it's a feast".  This means you have to have lots of one item eg lots of different colours, lots of images, lots of papers or lots of embellishments.
 For my card I have used the Sweet Pea Stamps image by Ching-Chou Kuik called "Coral Immersion". It's available as a digital stamp, single rubber stamp and as part of a multi-image plate (Sheet 12, Plate 41 - Coral Immersion is on the multi-image sheet with Enchanting Gold, Mad Tea Party and Cheshire Illusion).
I have coloured the image in with my new Graph'it pens.  I haven't got many but of course had to start with my favourite colour purple!!  The backing papers are from my Perfect Papercrafting CD.  For my feast part of the challenge I went overboard with embellishments - cheesecloth, raffia ribbon, die-cut scroll, die-cut flower button, Prima butterfly, gems and pearls.
**********************************
Today starts a new system for me at Sweet Pea Stamps.  All of the Design Team have been given a specific day to show you their creations.  I am teamed up with Susan and we will show you our creations on a Sunday.

The first of my weekly cards is "Holly Fairy" by Ching-Chou Kuik
I have kept the height and embellishments to a minimum as we are all concerned about the cost of posting items these days.  For my card I have used the Sweet Pea Stamps Ching-Chou Kuik image called "Holly Fairy".  She was one of my first Sweet Pea Stamps rubber stamps and she is still one of my favourite Christmas images.  She is now available as a digital imagesingle rubber stamp and as a plate of 4 images (Sheet 21, Plate 60 - Holly Fairy comes with the images Poinsettia Fairy, Holly Night and Cherish Christmas).  

The image I have coloured in with my Promarkers/Flexmarkers and highlighted areas with a white gel pen.  I added Glossy Accents to the holly berries.  For the large piece of backing paper I made this myself with various Christmas stamps and edged with a green chalk ink pad. 
The other backing papers are from Bearly Mine Designs Christmas Traditions.  I have finished the card off with some Marianne Designs holly die-cuts, card candi, ribbon and a stamped sentiment.
**********************************
The second of my weekly cards/creations uses Norma J Burnell's "Firefly Friends Owl".
I have used one of the stunning images by Norma J Burnell called "Firefly Friends Owl".  It is available as a digital stamp and a single rubber stamp.  I have coloured the image in with Promarkers/Flexmarkers, highlighted areas with my Sakura Stardust clear pen and inked around the edge with Tim Holtz's Tumbled Glass and Chipped Sapphire distress inks.
The backing papers are from my beloved Tim Holtz paper pad which my son bought me two years ago.  I have mounted the image on a Marianne Designs die-cut which I have inked with Tim Holtz's Chipped Sapphire distress ink.  I have finished the calendar off with some raffia ribbon, satin ribbon, washi tape, calendar tab and some decorative pearls.

Thursday, November 24, 2011

Beautiful Holly Fairy

Hello dear fellow Sweet Pea Stamps lovers. One of my most favourite image of Sweet Pea Stamps is definitely the beautiful 'Holly Fairy' by the amazing artist ching-chou kuik. She is such a pleasure to colour and perfect for any Christmas cards and projects. Remember, I used her on my candle as well. This time I made a card with her. You can find her on plate # 60 together with three other fabulous images and is available as a single stamp as well.


Here's a close-up of the image. I coloured it with Distress Inks.


A poinsetta as a decoration. The leafs and border are die cuts from Magnolia.


Your big chance to get the most beautiful Christmas and Thanksgiving images, including this Holly Fairy: all those stamps are on SALE right now. Your chance to rise up your collection.

Have a magical week!
Hugs, Karina

Wednesday, November 2, 2011

Christmas Candle

Hi everyone, Halloween is past now, and everyone is already thinking on Christmas, to get everything done in time... just less than two months to go. Something which cannot be missed in this time, not only Christmas itself, the time before.. the Advent season as well, are candles. 

So today I will not show you a card, but a beautiful candle I made with one of the gorgeous Sweet Pea Stamps images. This collection from the fabulous artist ching-chou kuik you can find on plate # 60 is perfect for. I used for my candle 'Holly Fairy'

I uploaded a tutorial on my blog how to make a candle step by step. You can find it HERE if you want to give it a try. It is so fun to make them.


Have a wonderful week. Thank you so much for your visit.
Hugs, Karina

Monday, July 25, 2011

Holly Fairy

Hi Everyone,

I think the heat is generating wishful dreams of Christmas, snow and cool temperatures which meant I finished coloring ching-chou kuik's Holly Fairy, part of Plate #60. The sentiment is from Plate #36.


This fairy had been in my 'unfinished' drawer for a while but I thought I'd give it a shot to see if I could get something going. The card itself isn't anything fancy BUT I think I saved this gorgeous fairy. And I wanted a silver background - something shimmery. So I used my silver metalic Sharpie pen.

I also used Viva Decor Gel Gloss on the berries and added some shimmer and glimmer to her wings with an orange Atyou Spica pen. Since I used copics to color the image, I made sure to do the background with the sharpie last.

Thanks for stopping and don't forget to check out the store for the latest new releases!

Thursday, December 23, 2010

Fluttering Fairy Christmas

I have 2 Sweet Pea cards to share with you today. Both of my cards I used 2 of Meredith Dillman's images/stamps at Sweet Pea Stamps. This first one is called Fairy Lights and you can purchase her by herself or on a sheet of 3 other GORGEOUS stamps, sheet #1/ Plate #76.


For my second card I used Blue fairy by Meredith Dillman and she is also on the same sheet.


This one I made months ago. It was when this set first came out in the summer and I forgot to share it with you.

The image is from Sweet Pea Stamps called Holly Fairy and she can be purchased as a single or on a sheet with 3 other beautiful Christmas images on it(Sheet #21/ Plate # 60 by ching chou kuiks)

I used some DCWV older Christmas DP. I added some lace and some American Crafts Holly Leaves and flower that I added glitter glue to then some MS fine glitter. I also added some ribbon from my blogging friend Rellz. I colored the image with copics and added some more glitter glue and fine glitter to the leaves.

Have a wonderful day and a Happy and safe Christmas!!

Thursday, December 9, 2010

Christmas will soon be here...

This is a tag ornament made using one of the adorable elf images by Elaine Cox on plate #71. I think I said it before, but I just love these little guys!


This ornament was made using some thin cardboard, a 3", 2.5" & 2" circle punch, printed papers, manilla cardstock, copics, stickles, Krylon gold paint pen, Zip Dry adhesive, gold ribbon, and crystal lacquer.

To start, punch 3 - 3" circles from the cardboard - I used the stuff a many places will line shirts or collage sheets with to keep them stiff. Apply a layer of glue to one and stack on top of another, repeat with the remaining circle. Punch 2 - 3" circles from your base paper and adhere one to each side of the cardboard disc. At this time, punch your hanging hole (I use a crop-a-dile) and add a 10" gold ribbon for a hanger. Punch a 2.5" circle from a complementary paper, center and adhere to one side of the ornament.

Punch a 2" circle from the manilla cardstock, stamp the image and color with copics. Adhere the image to the center of the ornament. Working around the edge of the manilla cardstock center, frame with gold stickles. Place your ornament on a flat, out of the way surface and add a layer of crystal lacquer within the stickle frame. Allow to dry about 2 hours.

After the lacquer has had time to set, cover the entire ornament front with a layer of lacquer - you will want to cover the existing lacquer also. This gives the ornament a bit more dimension. Allow to dry completely - at least 24 hours, possibly more if it is humid.

Edge the entire ornament with the gold paint pen. Leaving the back of the ornament empty you can add bit of manilla cardstock with your name & the year and you have a sweet little tag you can place on a package that will last many years - enjoy sharing!


Keeping up the Christmas spirit, I wanted to share this card with you today. The image is from ching-chou kuik's Fantasy Art Collection - titled Holly Fairy, it can be found on Plate #60. She was colored with copics, the papers are American Craft, the holly leaves and rhinestone are from Prima. I added a bit of crystal lacquer to each of the holly berries for a bit of shine.

Saturday, December 4, 2010

Christmas in flowers


Here's one of my new favourite images - poinsettia fairy from plate 60. It's such a wonderful image and a delight to colour. I love how happy she looks, like a kid on Christmas morning :)

I've been a little bit bored with my promarkers lately so I coloured her with oil pencils and then smeared it out with some thinner and a stump (you know those pen looking things made out of paper that artists use for pastels) I used three different papers from different lines, but I thought they worked beautifully together. The right panel is made out of two of them, strips I cut and glued on.
I found a prima flower pack that I had won last year, but never got around using. The golden swirls on it matched my image perfectly, something I didn't realize until later.

I LOVE the red/green/gold colour scheme for Christmas cards. It looks so rich and gives them such a decadent feel. Like chocolate cake with chocolate sauce and truffles. YUM!

Wednesday, December 1, 2010

Poinsetta Fairy

Hi! I have another Christmas Card to show you today using a gorgeous image from ching-chou kuik's plate 60. This one is called Poinsettia Fairy. All four of the images on this sheet are stunning and I intend to make Christmas cards with all of them (although they can be purchased individually, too).


I almost always get my color palette from the paper I choose, and this was no exception. I colored the image with Copics and then added some sparkle with both Stickles and a Sakura Clear Stardust glitter pen. The background is one sheet of paper - I cut a slit in the paper that is covered up with the image panel and cut along the edge of the ornament so I could slide the image slightly underneath it. The sentiment is cut from another piece of paper in the same line, then I went over the letters with the glitter pen.


The Details:
Stamp: Poinsetta Fairy - chin-chou kuik (Plate 60) - Sweet Pea Stamps
Paper: Bo Bunny, Prism Purple, White for image (Copic XPress)
Ink: Memento Tuxedo Black
Copics:
Skin: E000,E00,E11,R00,R20
Hair: FV2 (Lightened with a Copic Blender), V000
Flowers: BG000,BG02 both w/T0 over them,E47,FV2
Clothes and Wings: YG21,YG23,YG25,E47,E49,V12,V15,V17,FV2
Background: G20 w/E40 over, BG000, FV2
Misc: Recollections Pearls, Stardust Stickles, Sakura Clear Stardust Pen


:-)Traci

Friday, November 26, 2010

Holly Fairy

Hi! I am busy working on making my Christmas cards, and I was so excited to get to play with one of ching-chou kuik's Christmas images. Plate 60 has four absolutely stunning holiday images and I can't wait to make each one into a card (they can each be purchased individually, too).


The holly in this image reminded me of some older Bo Bunny paper that I had, so I did my best to color the image so the background would look like an extension of the DP (or the DP would look like an extension of the background of the image.) I colored the image with Copic markers and added some stickles and a glitter pen for sparkle. I used the Martha Stewart icicle punch on clear card stock, then covered that with tinsel glitter and layered it under the ribbon.

The Details:
Stamp: Holly Fairy - chin-chou kuik (Plate 60) - from Sweet Pea Stamps
Paper: Bo Bunny, Handsome Hunter (SU), White for image (Papertrey Ink)
Ink: Memento Tuxedo Black, Walnut Stain and Antique Linen Distress Inks
Copics:
Skin: E000,E00,E11,R00,R20
Hair: YG11
Wings and Clothes: YG11,YG25,YG17,G14,G17,G29
Holly and Background: YG11,YG25,YG17,G14,G17,G29,T6 all w/R02 over them, R24,R29,R39, E50
Misc: Martha Stewart Icicle Punch, Martha Stewart Tinsel Glitter (mica), Stardust Stickles, Sakura Clear Stardust pen, Ribbon (Retired SU), Cuttlebug Embossing Folder


I hope you are having fun getting your Holiday cards done!
:-)Traci

Wednesday, November 17, 2010

Christmas Sweet Pea Style

This is just one of the many different Holiday stamps available at Sweet Pea Stamps.


Holly Fairy is drawn by ching chou kuik and less complicated to color that most of her images.  I really enjoyed using only just a few colors for this image and they way she almost hides in the holly.  The berries have Diamond Glaze added to them for just a touch of shine.  The background paper is actually from the Kaisercraft pack called Hippy Girl, but the green was just what I wanted!  Be certain to see what else is available to play with for the holidays at Sweet Pea Stamps.  While you are there, make up a wish list and send it to those who need to know what you REALLY WANT for the holidays!  I promise, it beats getting a new toilet brush, LOL!

Friday, October 29, 2010

3 cards to share today

Tonight I wanted to share with you another Sweet Pea Stamps Christmas card. I used one of ching chou kuiks Christmas images called "Poinsettia Fairy" sheet #21/ Plate #60 and you can get her as a single or as a sheet with 3 other gorgeous Christmas images at Sweet Pea Stamps.


I colored the background with Twinkling H20's and the image with copics. I can't believe how many Christmas cards I have made already this year.


Ink: Memento Tuxedo Black

Paper: MS Christmas DP from last year, image was stamped on Mohawk white CS

Accessories: Prima flowers and leaves, gold bling for flower centers, background of image was colored with copics then I painted it with Twinkling H20's. I also added some sparkle with a Clear Sakura glitter pen and some green to the leaves, gold and green ribbon (the green ribbon was sent to me from my blogging friend Sarah)


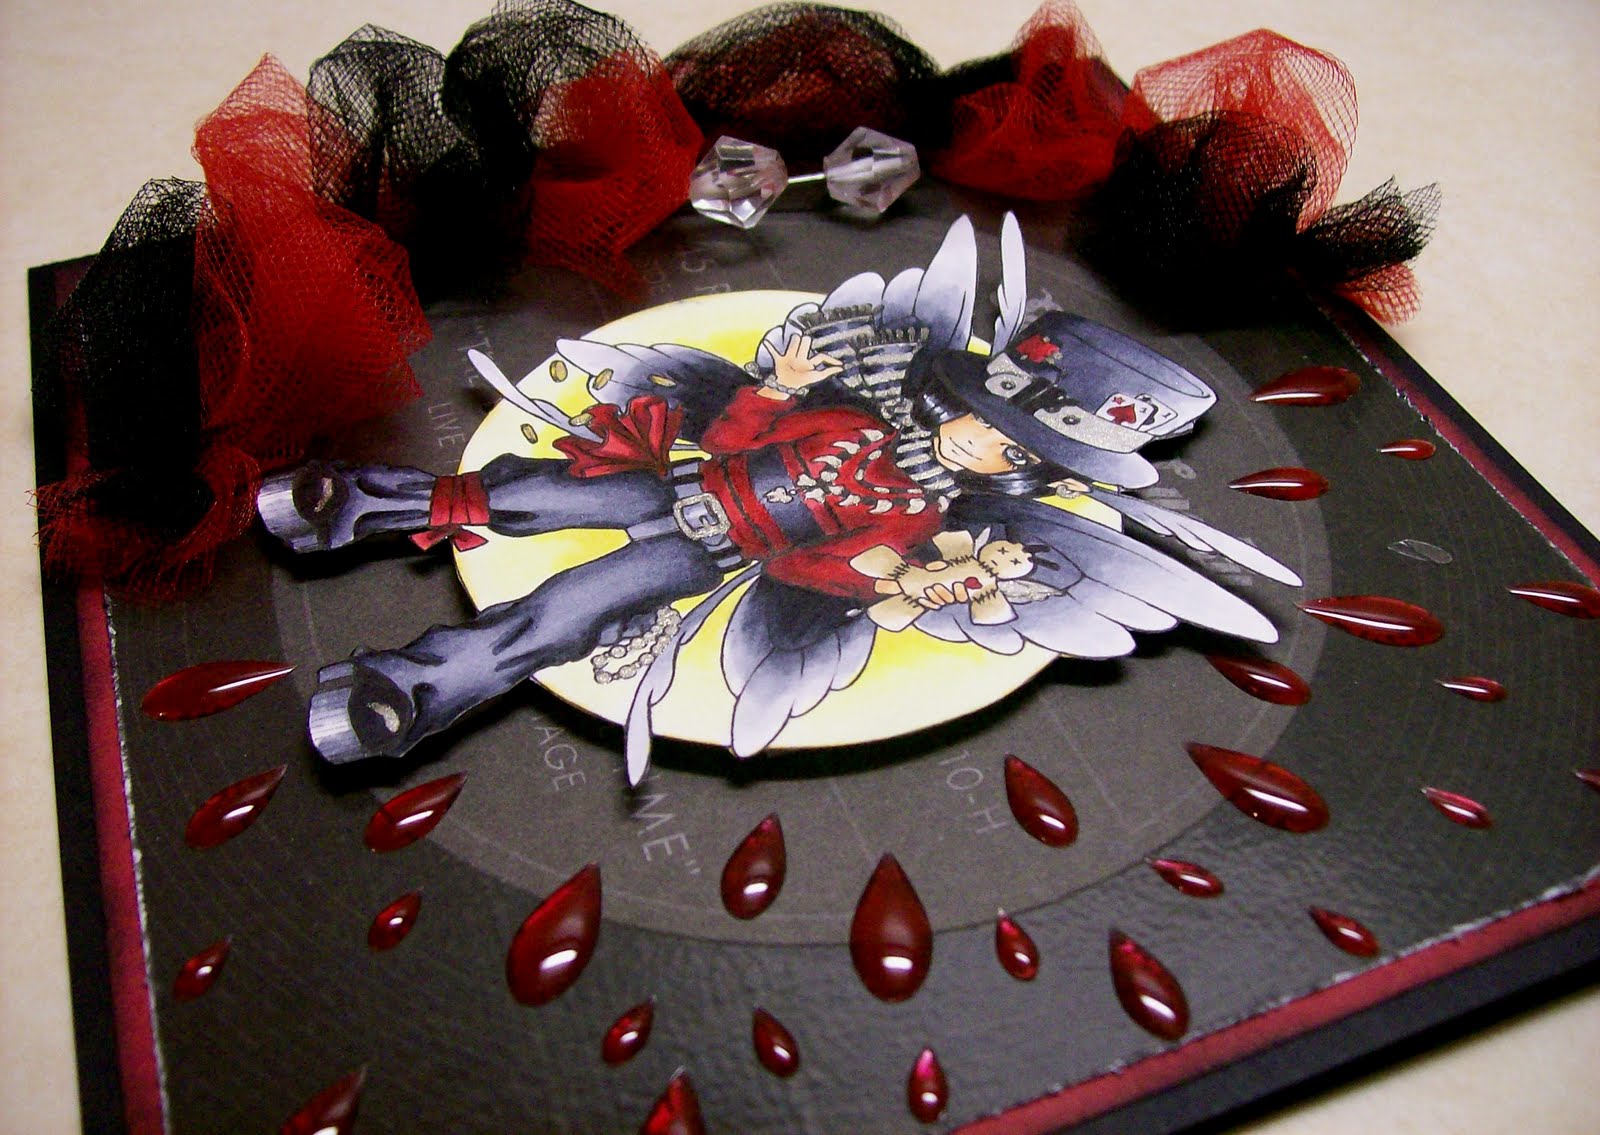
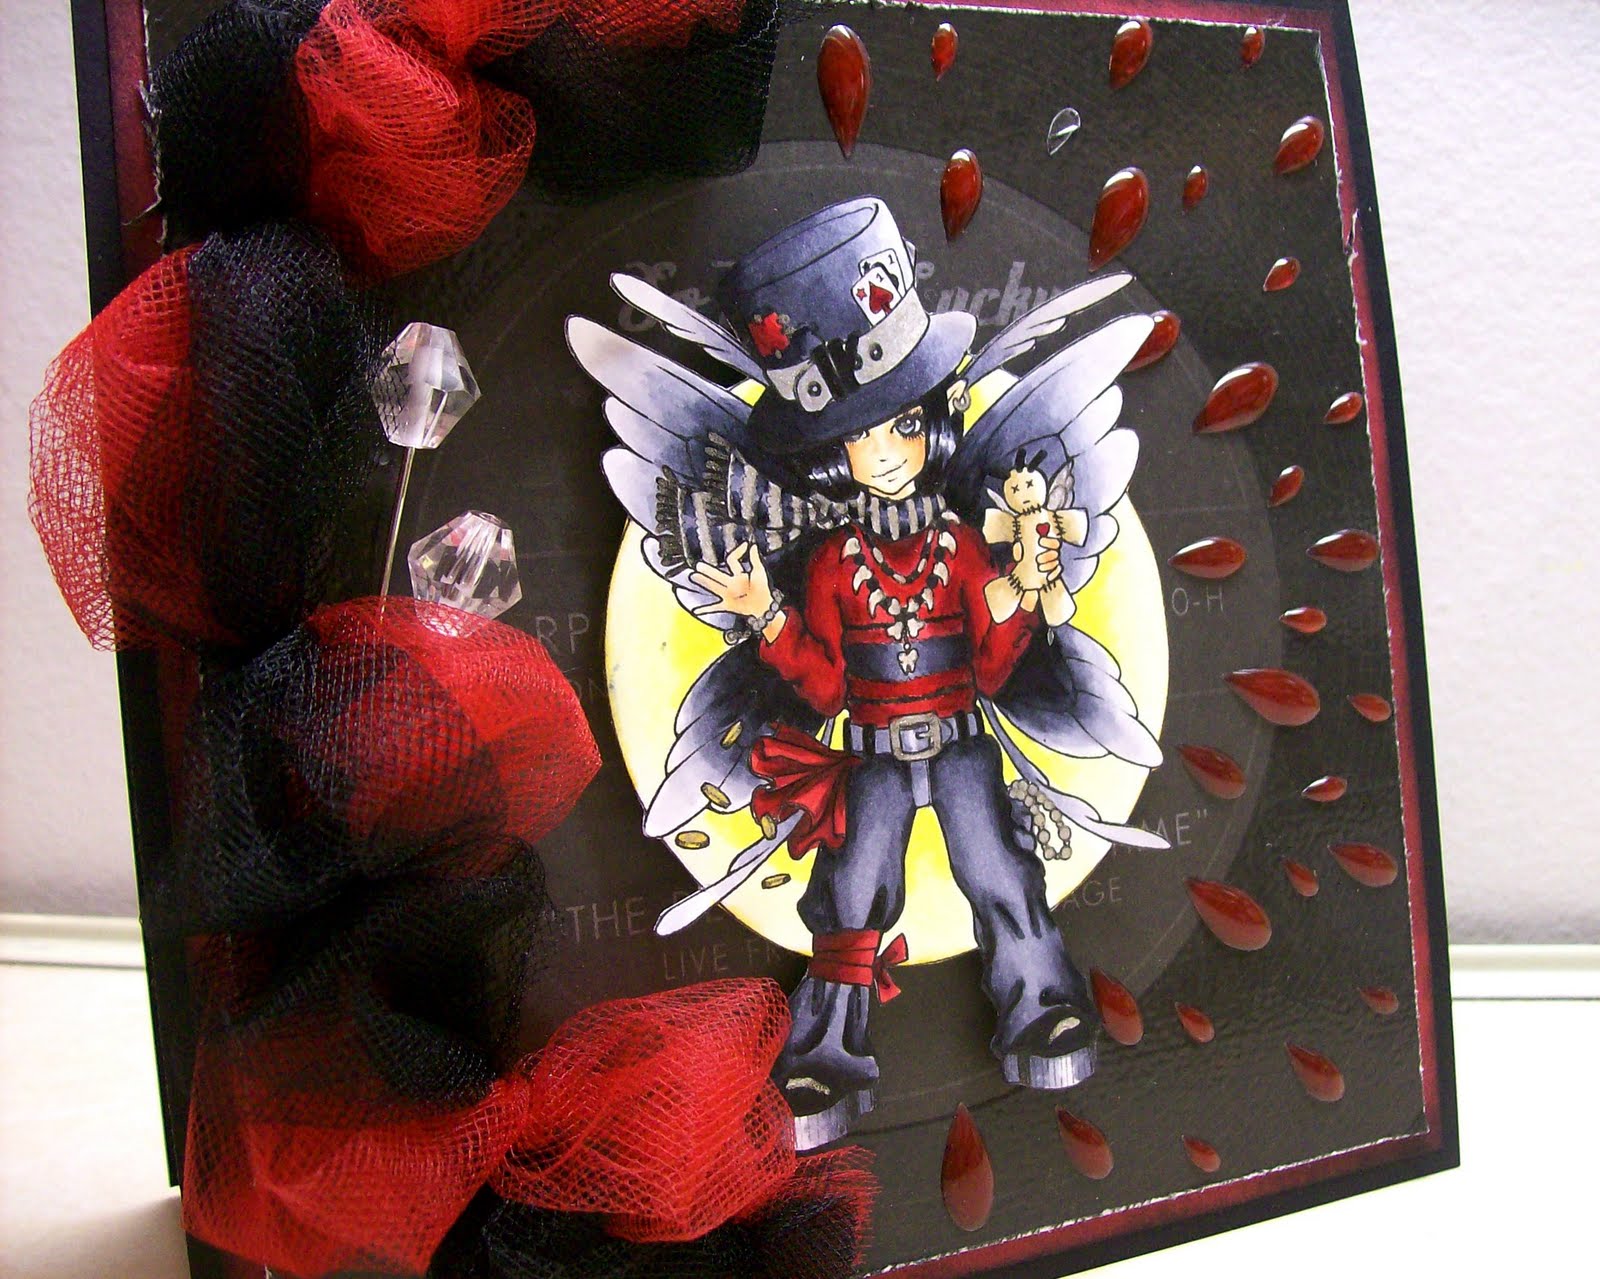
Here is "Zam" by Brigid Ashwoods. I love her Manga inspired Phunky Pharies. They have the cutest little faces. I had a blast coloring this image and feel so blessed to be a part of this wonderful DT.

You will have to forgive my pic's as it was dark when I took this pics and the colors are so bright they would had turned out better if I could had taken them outside with natural light. I wish you could see it in person.


Here he is with a totally different look.
Don't you love this card?? I created this card for my 16 year old Daughter who is crazy about Adam Lambert!! I think this image looks just like Adam except for the wings and longer hair. I used one of Sweet Pea Stamps new images by Brigid Ashwood and his name is "Zam" from her Phunky Phairies. He also reminds me of Johnny Depp as the Mad Hatter and Edward Scissorhands. So this image would be perfect for a Tim Burton Film challenge(TBD).

After I took these pics and edited them I noticed one of the tear drop embellishments has fallen off so I will have to add another one before I give it to her, but I was not about to take more Pics.


Supplies

DCWV DP

Sweet Pea Stamps by Brigid Ashwood " ZAM" stamp

Red and Black Tule

Fiskars teardrop embellishments

Pins from my Blogging Friend Rellz

Copic Markers

E00,E01,R01,E11

100,C9,C7,C5,C3,C1,C0, 0

R59,R39,R37,R35

Y0000,Y00,Y06,Y08

Clear Sakura Gel Pen

Sunday, October 17, 2010

Connie-Poinsetta Fairy by Ching-chou Kuik


This lovely image by ching-chou kuik is titled "Poinsetta Fairy"
but I tried to make her flowers into something else by 
coloring a soft pink and adding pearls to the centers.

I used some dp by 7 Gypsies "Baby Oh Girl"
pretty paper ribbon (unknown)
pearls by Kaiser Crafts
Copic markers

Just a soft restful card and you will
find the image by clicking
Thanks for looking
Connie

Saturday, October 9, 2010

Icicle Fairy......


Today I have the beautiful Icicle Fairy to show you!  OK, OK, her proper name is  ©ching chou kuik's Holly Fairy but I just did not want to color her in all reds and greens so I changed her to an Icicle Fairy! Artistic license! You can find her and then color her any way YOU wish at Sweet Pea Stamps. She can be bought as a single stamp or with 3 other lovelies! 


I colored my image with copics on Neenah paper. I just found out that this paper is made here in WI. Small world!!! After I finished coloring I tried something I have not done before. I used a set of Pearlescent watercolors to create my background and highlight my image. It is hard to see unless you open up the large image but it adds such a shimmer to her and is very pretty.  I need some practice to perfect my technique but was quite happy with my first try! I then added some lace, pearls, snowflakes and holly leaves to embellish my lovely! Thanks so much for letting me share her with you!


Don't forget to show us your Creations at our challenge blog "In A Sweet Pea Dream" for your chance to win some great prizes!


"Life's Beauty Inspires Me To Kreate"


Thursday, September 30, 2010

4 cards to share

I colored this image "Cherish Christmas" by ching chou kuiks at Sweet Pea Stamps (sheet #21/ Plate #60) and decided I wanted to cover it with some glossy accents to make it look like glass. As I set down to create a card for her I had this idea of creating a card that looks like a church. I remembered I had a stained glass embellishment and then it all started to come together. I added pop dots to the center piece the steeple part of the church to give dimension to the church.

I drew in the side stained glass windows and colored it with copics then went over it with some Twinkling H2o's and then added some liquid glossy accents over them. I cut out black strips and pop dotted them to create the steps of the church. The bushes under the windows are some Vellum stickers that were actually trees that I cut and layered with pop dots to add dimension.
Here is a close-up of the image, stained glass and shrubs.


Here is a pic of the shine from the glossy accents.

I also added some yellow silky rope/twine around the steeple ( center part of the card) just to give it that finished look and it also hides the pop dots when looking at it from the side.


Well I hope this inspired you to get creative with your next card and do something different!!


I really love how this card turned out!! This Christmas card will go to someone special to me..My Mom!! She'll love it!!


For this card I used one of the New BIG Elaine Cox Halloween images called "Twilight Halloween" at Sweet Pea Stamps. These images are so much bigger than all the other Sweet Pea Stamps. My card is a 5.5 x 5.5 , so you can tell how big this image is. Supplies:
Stamp:"Twilight Halloween" Elaine Cox at Sweet Pea Stamps
Ink: Memento Tuxedo
Paper: Basic Grey "eerie", Bright green and black CS, the image was stamped on Neenah Solar Crest White CS
Accessories: EKSuccess Big Bat border punch, Prima Flowers, Flower punches, Making Memories Metal tag, silver adhesive pearls
Copics: E11, R01,E01,E00,E000, R22, R20
Clothes:YR09,YR07,YR04,Y38, G28,G14,G07,G08,FYG2,YG25,YG03 and YG01
Hair and gloves: C9,C7,C5,C3,C1
Tree: E47,E57,E35,E33,E31,E30,E29
Background: BV04,BV20,BV23,BV11,BV31,BV00,V01,V000
Moon: Y04,Y00, E50,E51,Y32
Look at this Elaine Cox( Starry Halloween) image from Sweet Pea Stamps!!!!!!! Isn't it just gorgeous??? This image is HUGE!! I have her on a 6x6 card, so you can tell how big it is. I had the hardest time trying to get a decent pic of my card.. it is so much prettier in person. Sometimes pics just don't show the true beauty of someone artwork. I love that I was able to get so much dimension in her dress with my copics.

I used some Basic Grey eerie DP and circle chipboard. I used my new EKSuccess Big Spiderweb border punch. I love the bigger border punches they will be perfect for my Scrapbook pages


For this one I used one of Samantha Rawlings images at Sweet Pea Stamps and the name of this image is "Lil' Witch" sheet #2 Plate #62. I think she is so cute with her one eye showing!! The artist of this images is only 18 yrs old and she draws some of the cutest images.


I used some DCWV DP and a Creative Memories Jack-o-Lantern Die cut that I have had over 9 yrs..Talk about old. I added a pumpkin paper clip.


Thanks for stopping by and I hope you all have a wonderful day!!