Thursday, March 27, 2014

Misty Allure

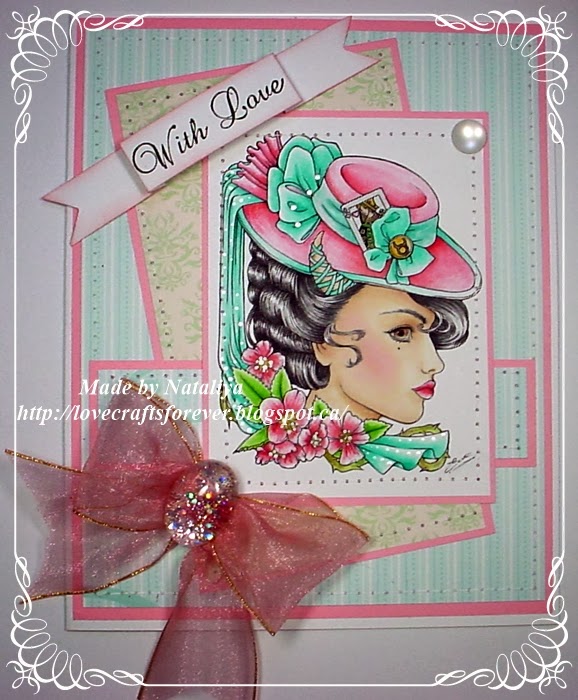
Hello, I have a stunning image from Ching Chou Kuik to share with you today, her name is Misty Allure. You can find her here at the Sweet Pea Stamps store.


She is coloured using Copics and a little glitter pen.

The background is handmade using cardstock and sprays, I have then distressed the edges and layered up. Added a little lace and ribbon from my stash, Kaisercraft pearls and a die from Memory Box. The flowers are from Wild Orchids Craft.

So glad you could drop by today,

Hugs Suzanne

Wednesday, March 26, 2014

Restless Thoughts Easel Card

Easel cards are my very favorite type of cards. They're so easy to make, the recipients always seem amazed by them, and I love how you can display both the message and the front of the card at the same time. So today I thought I'd show you how I make an easel card.


I've used Ching Chou Kuik's beautiful Restless Thoughts image. I bought it a very long time ago, but it remains one of my favorite images to color. The long lush hair, the cute wings and the great background can make for so many different looking cards, depending on the colors you use. And even though I always think of autumn when I see mushrooms, you could really color them anyway you like.

Most of my cards are 6x6 inches, so normally I use a 6x6 piece of cardstock as my front of the card. But this time I wanted it to look a little different when having the card open and on display. So I cut out a doily circle with my Cameo, and used that to mount the pretty image on.


I've used Copics and Prismacolor Pencils to color her in, and these are the ones I used:
Skin: E0000, E000, E00, E11, R20, Light Peach, Peach, Beige
Eyes: E30, E31, E34, E37
Lips: R21
Dress: BG72, BG75, BG78, BG99
Hair: E50, Y21, YR14, E15
Wings: BG000, BG10, BG11
Mushrooms: V0000, V25, V28, E81, E84, E87, E30, E31, E33, W3
Background: Mediterranean Blue, Light Cerulean Blue, 30% Warm Grey, 50% Warm Grey, Goldenrod, Light Umber, Sandbar Brown, Martine Green


I absolutely love cheese cloth for added texture, and thought it would be perfect for a card with an autumn mood to it. It's so easy to rip and tear into this gorgeous mess. I also distressed the edges of paper and cardstock with dark brown ink and a distressing tool.


This image is available at the Sweet Pea Stamps store as a digi image or in a rubber version.

Thanks so much for stopping by today.
-Lina

Tuesday, March 25, 2014

Fairy Bridal Inspiration.

Hello. Today is my day to post at Sweet Pea Stamps. This gorgeous stamp call "Fairy Bridal" by wonderful Regan Kubecek and you can find it HERE.  Image was colored with Aqua pencils and inks
Here is some close up photo on the image. I hope you like the way i colored.

Thanks for stopping by.
Nataliya

Monday, March 24, 2014

The Dragonfly

Sweet Pea Stamps

Today is my day to showcase an image from Sweet Pea Stamps and I have opted to use The dragonfly by Ching Chou Kuik
I haven't made an easel card for ages so thought I would make one for this card. The digi, being in a circle shape was just perfect for a circular easel card I think.  To begin with I digitally designed the base layer and the coloured shading for the front, also adding two circles of dragonflies, printed very lightly so they are just visible but would not distract from the digi.  (oops re the photo - I obviously had something blocking the light LOL)
Next I got out my watercolour paints, they have not seen the light of day for a few years and painted the background of the digi with a mixture of purple and cyan.  Once that was dry (after my cup of coffee) I then coloured the digi with Promarkers.
 To finish off the digi I used Crystal Stickles on the wings of the dragonflies and the trim of the dress. Gems were added to the centre of each flower and Lilac Liquid Pearls to the circular surround.
I should have mentioned that the print outs were then attached to purple card and cut with Spellbinders Grand Circles.  For the easel section I folded more purple card in half and used the same Spellbinder die to but it.  Some small dragonfly brads were added to the inside layer and more Lilac Liquid Pearls around the inner circular area to match the front of the card.
 I really fancied some lace on this card and decided to place it around the back, slightly ruffling it.  The lace was attached with a strong adhesive to the lower section which will be covered by the card top and also just in the centre area on the part that will be visible.  Then I cut a small scalloped circle with Spellbinders Scalloped Circles and cut it in half.  A few more Lilac Liquid Pearls and time for more coffee while all this was drying.
 Once dry I attached the semi circle in location to cover up the glue which would otherwise be visible on the completed card.
 The inside needed a little something extra so out with some skeleton leaves which I airbrushed with Promarkers the I rummaged through some of my flowers and found an almost perfect match.  The centre was wrong so I pulled this out and used the a gem, the same as I used of the flowers in the digi,    then added some Stickles and Liquid Pearls to the centre.
 So here we have the completed card.


Thank you for stopping by and hope you have a happy crafting day :) :) :) Hugs Jane 

Sunday, March 23, 2014

Sande's inspiration with Ching Chou Kuik


Hi all! It's Sande here showing you my week's inspiration. 
I have used this fabulous Soft wind blows image by ching chou kuik.
You can find it also with rubber and digi in the store. 
I have colored this beautiful image with my Copics and added the other things I love.
Have a fun with crafting!
Hugs, Sande xx

Saturday, March 22, 2014

Friday, March 21, 2014

Seahorse Illusion

Here's a stunning card from Sweet Pea artist ching chou kuik called Seahorse Illusion.  This stamp is totally amazing.  I used blue hair to give a water image and then matched it with several blues on the card itself.  I chose a bright orange for the seahorse and matching embellishments.
 
Here's a close up of the stamp itself.  It's currently available in both Digi as well as rubber stamp format.
Be sure and check it out on the Sweet Pea stamp site (click here) as the original artist's coloring is so very different from mine.  It really gives you a great idea for the versatility of this image.

Cheers, Holley

Thursday, March 20, 2014

Irish Chic

Hi Suzanne here with my first DT project for Sweet Pea Stamps, I am so excited.

I thought as St Patricks Day was only a couple of days ago I would share this fabulous image by Joanne Schempp, Irish Chic. You can find her here both in rubber and digi format.


I  have used Copics to colour and some Wink of Stella pens.  Added some flowers from my stash, green cardstock and DP.

Last of all some sequins for a bit of sparkle.

Thanks for stopping by
Hugz Suzanne

Wednesday, March 19, 2014

Girl dream

I fell in love with Karen Middleton's Unicorn Dreams image, the minute I saw it. And I knew I wanted to turn it into a perfect 'little girls' card, with pinks and purples. Although, I must admit, I'd be thrilled to receive such a girly card myself ;)


I turned it into an easel card. It is one of my favorite card types to make, since I love how you can read the message and see the front at the same time.


The gorgeous unicorn is colored with copics, using the following colors:
Mane: RV0000, RV000, RV00, BV0000, BV20, BV22
Unicorn: W00, W0, W1, W4, W6 (W6, W8, W10 for nose)
Greens: G40, G43
Yellows: Y32, Y35, Y38, 0
Background: BG0000


Adding black cardstock gives a lot of contrast to the pastel image, flowers and paper. And I really like how the black and white makes the colors pop.


The image is available at the Sweet Pea Stamps as a digi image or in rubber version.

Thanks so much for stopping by today.
-Lina

Tuesday, March 18, 2014

Weekly Inspirations With Nataliya

Today is my day to post at Sweet Pea Stamps. Also we have a new Artist Enys Guerrero, that i love images to color. This gorgeous stamp call "Tauro" and you can find it HERE.
I used distress ink pads to color, and blue and pink is my fave combo. Also i added silver paint dots .

All layers i stitched and added 3D sentiment.

Then i made a bow and used hail polish to make my gem sparkle

I hope you like it.
Thanks for your comments.
Nataliya