Friday, October 31, 2014

Inspiration With Nataliya

 Hello crafters!
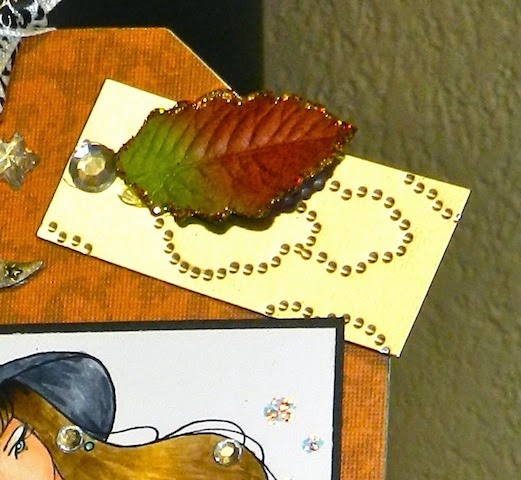
It's my time to post at Sweet Pea Stamps Blog. For my card i choose this very sweet stamp by Elizabeth Bell "Tummy Time". You can order stamp at the Shop.

 Some close up details
 I missed Summer already.
I hope i inspire you  and can't wait to see your creations.
Nataliya

Halloween in White

 Happy Halloween everyone!  Here's a great card I did today on some gorgeous paper in whites, as you can see it has a shimmery background that is embossed with ghosts.  Then I added some off white paper in which I die cut and embossed a graveyard scene as well as some grave stones and some skull and crossbones.  Can you just imagine the ghosts flying up out of the graves?

This gorgeous image is called Twinkle Twinkle Little Star from artist Katerina Koukiotis.

Here's a close up of the image, I think this gorgeous image could be used anytime of year!  Here in Austin we have a huge bat colony that is quite famous, so everyone loves to see bats.


You can download this gorgeous image and make a card for that Halloween treat today! or grab this stamp and use her for any other fun project you like.  If you do, share your creation with us over on the Sweet Pea Stamps Friends and Fan page at Facebook.

Cheers, Holley

Thursday, October 30, 2014

Neferata by Charmaine Flannery

Today design team member Suzi shares her project featuring Neferata by Charmaine Flannery. Isn't she wonderful?

You can find this gorgeous image along with many others in the Sweet Pea Stamps store!

Wednesday, October 29, 2014

Poinsetta Fairy-ChingChouKuik

This week for Sweet Pea Stamps I decided to showcase one of the images from Ching Chou Kuik called Poinsetta Fairy.
 
I have always adored this image and love using it for Christmas card.
 
 
I  colored the image with my Copics and tried a new hair recipe I really like and actually wrote it down lol.

Hair: E47,E57,E43,E53
Skin: E11,E00,E000, R20
Flowers: R29,27,24
Dress:G09,7.5
Wings:G02,G00,

Tuesday, October 28, 2014

Corner bookmark with Fae from Teresa Sherman.....


Goodmorning Sweeties,
Hope your weather is better then what we are having here in the Netherlands as this is my least favourite season :) I am a summerchild in heart and soul and love everything sunny and bright....Only thing nice now are the red/orange leaves as long as they stay on the trees hahahah
So today I want to show you a corner bookmark that I made with the Gorgeouss stamp Fae by Teresa Sherman.

I coloured Fae with a new alcohol marker that I found here in Holland. They are called Stylefile markers and have a small bullitnib and a chisel nib like copics have. No brush nib yet :) but they really have a nice feel in the hand and that is important for me ;) and super PURPLE TONES hahahaha

Hope you like my corner bookmark with Fae. You can find her in the Shop.

Monday, October 27, 2014

Come softly - Sande's view


Hello you lovely crafters!
Sande here with you today showcasing a card using this fabulous image by Ching Chou Kuik.

Doesn't she just look elegant. Only little bit of blue, grey. She has called "Come softly".
 Looks like a snow gueen to me.

 This Beautiful image can be found at the Sweet Pea Stamps store as a rubber stamp and as a digital.  

There is much more fabulous images at Sweet Pea Stamps so don't forget to pop over!
Hope you'll get some inspiration here and create something great!

Don't forget to come back every day and see other DT's outstanding creations!
Hugs, Sande xx

Sunday, October 26, 2014

Acacia Fairy

Sweet Pea Stamps

Today is my day to showcase an image from Sweet Pea Stamps and I chose to work with Norma Burnell's - Acacia Fairy, I do so love these zantangle images, so beautifully drawn and enormous fun to colour :)

I think I stretched myself a bit far with this creation, 7 hours to make and trying to colour 4 images the same was a first for me.  By the end of it, with the images being quite small my eyes were all over the place hahahaha.

IMAGE

To begin with I made the box using a great template which was in one of the Tattered Lace magazines. Next I removed the background from the digi and replaced it with what I hoped would match up with the card I used,  In real life the colour is not a bad match but alas under the lights when taking the photo is is showing up far more pink/red than it really is.  I then printed the image 4 times so I can put one on every other section of the octagon.

 Next I coloured the images with Spectrum Noir Blending Pencils, certainly an interesting task colouring 4 images at the same time :)  Gold pen was added to parts of the digi and the background was coloured over again with one of the crayons and with an embossing folder underneath to give texture.
Here you can see how using a crayon with an embossing folder underneath creates the texture.
With all four digis coloured I mounted them using gold card and Spellbinders A2 Fancy Weave die.
 Onto decorating the box now, I cut a total of 8 of the fancy weave sections, four for the digi backing and four to fill in the remaining four sections of the box.  Next, using a Tattered Lace buckle die and the same card I cut another 12 elements.  One of each of these will be placed around the top sections of the box and the remaining four in the centres of the non digi panels.
 A simple tag with blue gems.  The same blue gems were used to decorate the top of the box.
To finish off a big bow in gold organza and turquoise ribbon.  Two gold lilies were added to the bow and the tag hung from it.  And there we go, all done.


Ingredients
  • Image -  Norma Burnell's - Acacia Fairy
  • Spectrum Noir blending pencils
  • Dies - Spellbinders A2 Fancy Weave and Tatter Lace buckles
  • Ribbon and gems from my stash
Thank you for stopping by and hope you have a lovely crafting day ahead of you :)

Saturday, October 25, 2014

Helena Reis - Artist week, Milo´s view


I´ve used Helena Reis´s Purple Gaze.

big hugs Milo =)


Featured artist - Helena Reis - Tera's view

 Hallo,
    I really had fun with this image - although I may have gone a bit wild with the pearl drop pen I really like how she turned out!!!
   I used 'Purple Gaze' by Helena Reis and colored her with copics. I edged the main image with a silver metallic pen and layered her to DP that I distressed a bit and some pretty gray ribbon.
  I really like how her wings turned out too :) she is fun to color and I have a few more ideas in store for her!!!
   Take Care
          Tera

Friday, October 24, 2014

Artist Of The Week With Nataliya

Hello Bloggers. It's my time to showcase Artist of the Week at Sweet Pea Stamps - Helena Reis. And today i am using one of her gorgeous stamps "Berry The Fairy".

She is one gorgeous Fairy with a very yummy Strawberry. Image colored with Distress Inks

Some of the embellishments.


Thanks for stopping by.
Nataliya

Featured Artist Helena Reis card by Holley

Meet Sybille.  She's an awesome image created by Sweet Pea artist Helena Reis.  I am totally loving this witch/fairy. I love that she flies her broom with her cat too. I added some lovely spider web die cuts with spider charms hanging down from black bows.  I put two simple sentiments on the card to go with her.  Isn't she just perfect?  I think this witch could be used on all sorts of cards, not just Halloween.

Here's a close up of the image.


Be sure and check out all of Helena Reis' images, I just love her beautiful maidens.  She also have some adorable fairies and cute animal stamps too!
Cheers, Holley

Thursday, October 23, 2014

Featured Artist Helena Reis's Alice by Suzi

Good Morning All, It's featured Artist week here at Sweet Pea Stamps, and this week we are focusing on the beautiful image by Helena Reis.  Helena's image have a lovely whimsical feel to them, and choosing one to work with was quite difficult, as I love so many of them.  In the end I went with one of my favourite themes - Alice in Wonderland and used the gorgeous Alice image by Helena.

Here's my project,
Doesn't Alice look wonderful on this Altered MDF Teapot, I had great fun with this project, and you can find lots more details over on my blog.

I really recommend you check out Alice in the store, as Helena's original version is quite different to my version, I'm sure you'll be quite surprised by how different they actually look.  I hope you like my intpretation.  That's all from me for today, don't forget to pop back tomorrow for some more gorgeous creations from our talented design team.

Bye for now
Suzi

Hi!

Time for some more inspiration and I used the beautiful digi by Helena Reis
'LILURA'
Isn't she pretty?! I colored her with copics and made a tag. The rolls add interest and dimension.

They're held back from a pretty stamp and matching punch from SU
(gotta love those sets)
I also embossed a metal tag in my bigshot using an embossing folder from Su
Added stickles and bling in various places. The flourish is a diecut from SU and so is the builder owl. (the rest is from my stash)

The tag is chipboard and so is the flourish, covered it with black CS.


Wednesday, October 22, 2014

Featured Artist-Helena Reis

Since I still have Halloween on the brain, I thought this adorable image from Helena Reis called Trick or Treat.  The paper is from my stash of Halloween papers. I used a variety of Copics to color this one up. 

Our lovely Lynette from Sweet Pea also gave us some sentiments to work with and thought this one was perfect for a Halloween theme card.  See sure to check out all the lovely images available from Helena at Sweet Pea Stamps.


Tuesday, October 21, 2014

Featured Artist Helena Reis- Ria's view...


Hi,
welcome to my posting. Our featured artist is Helena Reis.
I just love her stamps. 
For my card I used the Bucket full of puppies stamp and coloured her with Spectrum Noir markers.

The white dots are added with Molotow markers and the digipapers arre made by Moi...

I hope you enjoyed my card.


Monday, October 20, 2014

Featured Artist week - Helena Reis - Sande's view


Sande here with you today showing a card by using the Featured Artist image. This week our Featured Artist is Helena Reis.


This is such a fun image and super cute!! It's called "Fairy Tea Party.".
 Oh, I love it! I did use my Copics by coloring it. The image can be found only in digital. 

There is much more fabulous images at Sweet Pea Stamps so don't forget to pop over!
Hope you'll get some inspiration here and create something great!

Hugs, Sande xx

Sunday, October 19, 2014

Featured Artist Week - Jane's view


Sweet Pea Stamps

Today is my day to showcase an image from Sweet Pea Stamps for our Artist Week where the whole team are using images by Helena Reis,  I have chosen to work with the image Moonlight Whispers.

I started by colouring the image with Promarkers. Then used a Spellbinder circle die to cut it out.
Promarkers used and my trusty gold pen
 Next I sorted my papers.  For the background I used starry night vellum and while in the draw getting that out I came across some pinky purple plastic with holographic squares.  When the light catches this it looks like there are stars lit up.  Having totally forgotten about this plastic paper I was over the moon as it was just perfect.  To add some texture I embossed one corner of the plastic with a Tattered Lace embossing folder.  For the border and the doily I used the same starry night vellum that was used for the background.  A digital sentiment was printed and cut.  I ended up not using the sentiment as this was one card that did not follow my planning.  Originally I had a song printed in mauve to fill a circle on acetate which I was going to overlay over the digi.  Alas I did not like the result, it seemed like a good idea when I thought of it but did not work out as I had hoped.  The sentiment was perfect for the song but on it's own a little cryptic so I changed to a hand stamped Happy Birthday sentiment instead.
 Here is a close up of the plastic paper which I have embossed.  In the final photo where I have used a light box this paper has become very transparent and most of the navy blue backing is shining through.  Anyway, not to worry but in real life this is the true colour.
 My attempt at rubber stamping, something I keep dabbling in but am not very successful at, I am a digi person hahaha.
The border was cut with a Tim Holtz die and I added a wee gold star and a heart to the bottom of the sentiment layer.  The plastic paper was attached to the card with the same gold stars.
Inside of the card - using the same paper as the sentiment and a Scalloped Circles Spellbinder die I created an area for a personal message.  This was edged with a gold pen and some wee dots added.  There was a scrap of the starry night vellum left, not worth keeping so I decided to cut the doily again with it (well most of the doily, the paper scrap was not big enough for all of it <g>) and cut two good quarters for the diagonal corners.
 Finished card
Ingredients
  • Image -  Helena Reis  Moonlight Whispers
  • Promarkers
  • Dies - Tim Holtz Decorative Strip Die, Spellbinders Circle and Scalloped Circle
  • All other items from my stash
Thank you for stopping by today and hope you have some happy crafting time ahead of you :) xx