Friday, April 23, 2010
Enchanted garden and flower tutorial
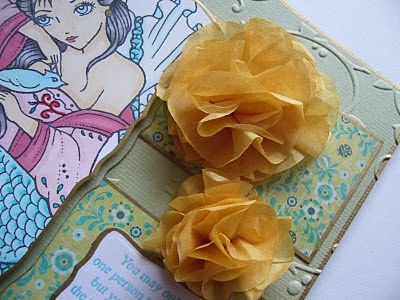
This time I want to show you "The Serene Night" - another wonderful stamp from Sweet Pea that I hadn't played with until now. The text is from sheet 7 plate 29 and the stamp from sheet 4 plate 24. I actually had this image coloured and matched with the papers. It was laying around and I needed to clean my space a bit so I thought it was time to get it finished. I also made two flowers from a gift wrap paper that happened to match perfectly! I love how this card makes me feel - like I was in some enchanted garden.
Here's a detail of the embossed background with golden birds that I made:
Here's how I made the flower:
I used my blossom nesties, but you could use circles or cut shapes out by hand. I even embossed them to give them an extra edge, but I don't know if it really shows. Cut out 6-7 of them in silk paper (the ones you have to gift wrap)
After you've cut them out, poke them into your hand like shown on photo to scrunch them up.
Glue them side by side and work your way around until you're satisfied with the result. You might want to use a smaller shape to fill in the gaps in the middle.
Use different shapes to make different sized flowers:
And there you have it. If you use my tutorial, please leave a comment linking to your post so we can have a look.
/Katarina
Labels:
ching-chou kuik,
Katarina,
Plate #24,
Plate #29,
The Serene Night,
Tutorial
 Welcome to my blog. I'm the person behind kamadesign. Here you can read all about my latest crafting shenanigans, tutorials, freebies and more. Follow me here, on instagram, facebook and youtube to stay up to date. Links on top of page. Enjoy!
Subscribe to:
Post Comments (Atom)


Katarina, I love your card and these flowers are oh so pretty. You did a wonderful job on this. Thanks for sharing
ReplyDeleteLove the card!! The background looks fab especially with the gold and the flowers are beautiful!! Love the tutorial thanks for sharing Love Chanelle xx
ReplyDeleteWOW THIS IS GORGEOUS XX
ReplyDeleteOMG girl that's awesome. I'm so going to get that die and try it. Those flowers look awesome!!!!! The whole card is awesome and love the embossed outside. Beautiful.
ReplyDeletewhat a cute flower project! Thanks for sharing the idea!!
ReplyDeleteThanks for the tutorial
ReplyDeleteGreat tut Katarina! You explained it so well that even I could do it.
ReplyDeleteYour card is fabulous also!
Connie
Sooo beautiful, and the flowers are perfect with that enchanting image! xxD
ReplyDeleteSo gorgeous ! really love your cart and the tuto ! thanks !
ReplyDeleteHugs !
Katarina, this is wonderful! Those papers are fabulous with her and I love the extra touches you gave the embossed background! Thanks for the flower tutorial! :-)Traci
ReplyDeletethanks for the tut! Those are darling!
ReplyDeleteGorgeous Katarina!!
ReplyDeleteLove how you made the birds gold! Very cool techniques!
Stunning card Katarina, love the embossed golden birds, gorgeous dsp, thanks for the flower tutorial, have a great weekend, take careX:)
ReplyDeleteWhat a gorgeous card! Love that you turned the embossed birds gold.
ReplyDeleteR/
thanks so very much for sharing! lovely!!1
ReplyDelete