Showing posts with label digi stamp. Show all posts

Sunday, May 10, 2015

Precious Moments - Jane's View

Sweet Pea Stamps

Today is my day to showcase and image from Sweet Pea Stamps and I have chosen to work with the beautiful image Precious Moments  by Charity Dauenhauer which is available from the Sweet Pea Store in digi format.


I have had this image for a while and totally forgot about it - wonder how many of us do that :) :) Anyway, I spent a weekend colouring up several images for upcoming creations and this one one of them, isn't it just so precious.  The image was coloured with Promarkers and the sun/moon was edged with a silver pen which I smudged around to try and create some flare.
 I came totally unstuck with the background, just did not know which way to go.  In the end the chalks won and I used several shades of blues.  For the final layer I put an embossing folder underneath and pressing quite hard with the dark blue chalk, rubbed over to pick up the texture. Chuffed with this, it worked a treat.
Great, the background sorted now onto the card.  Oh dear - dead brain.  I knew what I did not want to do but seemed to have no idea what I did want to do.  Several cups of coffee later I came up with a plan. This card has certainly not been an easy one by a long shot :)
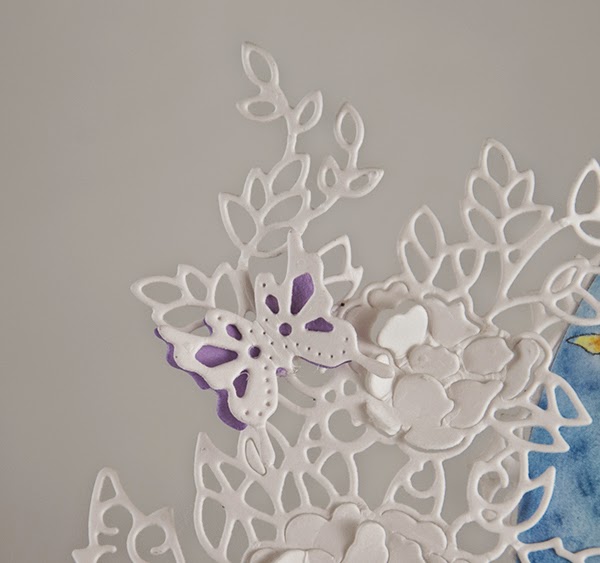
I ended up going for a twisted easel card with a very lacy look just using dies. I just adore the Tattered Lace die I got on a magazine a year or so ago and for this creation I cut it three times.  Two of the cuts were left whole and the third I cut into a couple of sections and attached them to the whole die on the front.  The image was cut with a Spellbinder Oval and mounted on the Tattered Lace Antique Oval die.  To finish off the die cutting I then added a tiny butterfly to link in with the image using Cherry Lyn Designs Mimi Butterflies and used mauve card for the underside of the wings.  The sentiment was a simple silver congratulations which I had to cut down to Congrats to fit into the area created by the inner cut of the Tattered Lace Antique Oval die which is a buckle to which I threaded wide organza ribbon through.  Finishing off I added a large white double organza bow with a safety pin charm and a blue button and then a spray of pearls.

 On the inside of the card I used some blue patterned vellum and then added the third of the Tattered Lace rose cuts I made.  Some pretty ribbon with baby items was attached on the lower edge and a writing area using Sizzix - 657938 which I mounted with foam tape.  There we are all done :) :) :) 

Ingredients:-
  • Image - Precious Moments  by Charity Dauenhauer 
  • Colouring Medium - Promarkers
  • Dies - Tattered Lace die I got on a magazine a year or so ago, Spellbinder Oval, Tattered Lace Antique Oval die, Cherry Lyn Designs Mimi Butterflies and Sizzix - 657938
  • Embossing Folder - Tatter Lace butterflies
  • From my Stash - ribbon, chalk, vellum, charm, pearls
Thank you for stopping by today and hope you have a happy crafting time ahead of you :) xx

Sunday, April 26, 2015

Hope - Jane's View

Sweet Pea Stamps

Today is my day to showcase and image from Sweet Pea Stamps and I have chosen to work with the beautiful image 'Hope' by Rebecca Sinz which is available from the Sweet Pea Store in both rubber and digi.

I have not made any of my candles recently and now seem to be on a bing with them.  I did one a couple of weeks ago, this one today and another one in the pipeline which I am trying to do a video tutorial on - that is a challenge in itself lol.  Anyway, here is todays candle :)

So many folks ask how I do these candles hence the trying to make the video but in the meantime I will do my best to explain the basics.  I start by using temporary adhesive spray on a piece of paper about 220gms in weight and then lay the tissue paper over the top doing my best to avoid any wrinkles.  Next I trim the excess tissue paper off so it will run through my printer with no issues.  To prepare my wrappers I use a template I made of the candle sizes I use regularly.  I then browse through my photos to find a suitable background.  For this wrapper I used two images, the sky was a photo I took in the Maldives on my 25th Wedding Anniversay - a fabulous second honeymoon lol, and for the foreground I used a beach scene taken while lying on my belly to get the rocky outcrop.  Next, in Photoshop, I imported the two images and removed the sections I did not want, here it was all the see and sky from the beach photo so I was only left with the rocky outcrop which I thought would be perfect to place the digi on.  Next I removed all the background from the digi so I was left with the equivalent of a .png image which I could then hand colour in line with the Terms of Use of most of the image we use these days.

I use crayons to colour my candle wrapper images as I find they work the best, this one was coloured with Faber Castelly Polychromos
And here is the image fully coloured.
Next I tried something new and tried rubber stamping a gold border, sentiment and a floral design to represent stars.  The sentiment worked fin and the flower stars were not to bad but the border was a disaster.
When working with candles it is imperative to think of fire safety, I would so hate to be the cause of a fire in somebody's home from one of my candles, so I have a couple of produces which are totally safe for decorating.  One is a gold dust and the other is a water based varnish.  To cover up the rubbish gold border I used the gold dust and tried to get a a vibrant distressed look.  This was applied with a soft sponge for the top and then I used a wide paintbrush to sweep around the upper section of the wrapper. To balance the gold out I added some more to the rocky outcrop at the bottom of the candle. Finally a quick layer of the candle water based varnish to add a shine and all done :)


Ingredients:-
  • Image - 'Hope' by Rebecca Sinz
  • Colouring Medium - Faber Castelly Polychromos
  • From my Stash - gold dust, candle varnish and the candle.
Thank you for stopping by today and hope you have a happy crafting time ahead of you :) xx

Sunday, April 19, 2015

Artist Week - Ancient One - Jane's view

Sweet Pea Stamps

Today is my day to showcase and image from Sweet Pea Stamps and I have chosen to work with the beautiful image Ancient One by Joanne Schempp which is available from the Sweet Pea Store in both rubber and digi.
I have not tried mixed media like this before so be gentle with me :) :) I am in awe of some of the mixed media projects I have seen on the web and just could not resist giving it a go.  To begin with I printed my image, well two as I was thinking about having another Joanne Schempp image of the sail ship in the background but had not totally made up my mind.  The idea soon flew out the window and I decided I did not need it.
 Next I raked out a whole load of dies and double cut them using stiff white card.  The dies I used were Tattered Lace Retro Alphabet, Memory Box Splash Border which I cut up into two sections and also used the spiral excess bits of the die and finally Marianne Designs Creatables Anchor.  I also added some Flower Soft and some bead and metal shells.
 I don't have many supplies for this sort of project as not much is available in Saudi Arabia, or a least I have not seen many products around but I do have some white acrylic paint so that is what I used to paint over the background ready for airbrushing with Promarkers later.  Next I coloured the image with just one colour of blue Promarker, trying to build up the colour but using several layers.
 Onto the background, I first masked my coloured image and set to with the airbrushing in two colours of blue, one was Bluebell but I can't remember what the other was lol - afraid I was having to much fun to remember to write down what I had used.
 Next I stippled some PVA glue in areas and then stippled with silver bronzing powder on top. I added lots of Pearl and Silver Liquid Pearls to the digi.
Not quite happy with the digi so using the darker of the two blues I used for the background I added a bit more depth to him.  Finally I added a silver ships wheel charm and three brads. A blast of Crafters Companion Silver Varnish and all done.  This decorated mat was then mounted on a silver mirror card mat, a navy corrugated mat and then a mauve mat. The group was them attached to my navy card blank.
For the inside of the card I used Spellbinders Labels 1 and a Spellbinder embossing folder.  A bit more of the silver bronzing powder and another anchor completed this section.
 And here we have it - a rather funky man card.  For a first attempt I am pretty pleased with myself and most of all I had amazing fun, getting covered in paint and glue I felt like a kid all over again, such a fun day :) :) :)

Ingredients:-
  • Image - Ancient One by Joanne Schempp
  • Colouring Medium - Promarkes, acrylic paint
  • Dies - Tattered Lace Retro Alphabet, Memory Box Splash Border, Marianne Designs Creatables Anchor and Spellbinders Labels 1
  • Embossing Folder - Spellbinders Seashells
  • From my Stash - Silver Bronzing Powder, Liquid Pearls, shells, metal shells, ship wheel charm and brads
Thank you for stopping by today and hope you have a happy crafting time ahead of you :) xx

Sunday, April 5, 2015

Blow Me A Kiss - Jane's view

Sweet Pea Stamps

Today is my day to showcase and image from Sweet Pea Stamps and I have chosen to work with the beautiful image Blow Me A Kiss  by Lynne Stansbery which is available from the Sweet Pea Store in digi format.

I started by colouring the image with Faber Castell Polychromos pencils.
Next I needed some green card as my card base but did not have the colour I wanted so out with a white sheet of card and airbrush it with my Promarkers.
 Next I cut my card blank with my die cutter and a design I created.
Next I embossed my contrasting mat with an Embossilicious folder.  I then distressed the edges and added some very slinky lace behind.
 Now for some flowers.  I have used flowers I bought but I removed the centres which were an orange/yellow and did not fit in with the colour scheme of the card and replaced each centre with a dark pink pearl surrounded by pale pink pearls.
For the inside of the card I used the Spellbinder Oranate Square die.  The front of the card was finished off with a bit more lace, a Birthday sentiment and a luscious bow, with a few more pink pearls dotted around for good measure.


Ingredients:-
  • Image - Blow Me A Kiss  by Lynne Stansbery
  • Colouring Medium - Faber Castell Polychromos pencils and Promarkers
  • Dies - Spellbinder Adorning Square, Grand Squares and Label 20, floral card shape by me.
  • From my Stash - pearls, ribbon, lace, sentiment peel off.
Thank you for stopping by today and hope you have a happy crafting time ahead of you :) xx

Saturday, April 4, 2015

The East Wind's Lucy Loo Mustache - by Angelique

Good morning.

For todays blogpost, I've made a tag using the rubber stamp 
You can find her in  shop HERE


MATERIALS:
Aquarel paper, mask/stencil, 3d glitter paints, relief paste, Inka Gold creme's, washers,
Bister powders, distress ink/markers.


I stamped the image twice.
1 to colour en 1 to use as a mask
First I've cut the tag out of aquarel paper, placed the mask image on the tag and then 
used the Bister powders.
With the mask still on there, I placed the stencil to use with the relief paste.
Took the stencil and mask off and started colouring my image, whilst lettin my tag dry

Once dried, I placed the stencil and mask back on the same place to go over the relief paste(clogs) with the 3d glitter paint.
I rubbed a bit of the inka gold creme's in between the cogs and coloured the mini washers 
with the creme's too.
Glued them into place and let the tag dry again.
Last I placed my cut out coloured image and made a little rope/twine bow at the top


Lucy Loo Mustache is also available as digi stamp and can be found HERE

We have a verry nice and friendly group on facebook and we would love to see your projects with any of the Sweet Pea Stamps.

I hope you enjoyed my project
Wishing everyone a Happy Easter and
see you again next week
Huggsss, Angelique

Sunday, March 29, 2015

Forget Me Not - Jane's view

Sweet Pea Stamps

Today is my day to showcase and image from Sweet Pea Stamps and I have chosen to work with the beautiful image 'Forget Me Not'  by Rachel Anderson which is available from the Sweet Pea Store in  digi format.

I started adding my text to the image before printing, there is another wee bit to the text which is not shown here and is used on a mount later on.  Next I coloured the image with Faber Castell Polychromes pencils.
 After cutting all my mats on my die cutter I set to work on completing the topper text section.
 With the basic bits now all done it was time to assemble. I started by embossing the two square mats with an Embossilicious folder.  The blue mat was attached to the card.  The white one had lace applied and then was also glued to the card.  The digi section had a string of iridescent pearls glued round the edge and then I placed this on the oval blue mount.  For the inside of the card I used Spellbinders Scalloped Square and then I cut eight Tattered Lace Doily Coners, four for the inside of the card and four for the outside.


Ingredients:-
  • Image -  'Forget Me Not'  by Rachel Anderson
  • Colouring Medium - Faber Castell Polychromes pencils
  • Dies - Square and Oval dies by me, Spellbinders Scalloped Squares and Tattered Lace Doily Coners
  • From my Stash - lace, pearls and bow
Thank you for stopping by today and hope you have a happy crafting time ahead of you :) xx

Sunday, March 15, 2015

Do Your Own Thing, Jane's view

Sweet Pea Stamps

Today is my day to showcase and image from Sweet Pea Stamps and I have chosen to work with the stunning new image in the store - Do Your Own Thing by Lynne Stansbery which is available from the Sweet Pea Store as a digi.  The image comes with the wonderful sentiment too :)

I have really messed up here, it is not like me to not take lots of photos as I am going along but today I only took two and neither one is worth adding to the blog.  I hope you will forgive me:)


For this card I used a very soft pink pearl card base which I cut to my usual 140cm square size then trimmed down so I could incorporate and over the edge lacy top using the Marianne Designs Creatables Anjas Vintage Decoration which I then embossed the section which was not part of the cut out, this formed my first matting layer.  The base layer of my card was covered with pink lace.  I then spent the next 4 hours or so colouring in.  I really did have issues here, should I just colour the background, skin and hair of the dancers and leave the rest uncoloured as this image is so beautifully drawn and shaded or should I colour with something a bit different, I really did not want to do pink.  With having the dark skinned child in the quartet whatever colour used had to work with browns, that left me with turquoise as my first option or maybe yellows which I am not keen on.  I don't think I have coloured anything in peach before so, with fingers and toes crossed, this was the route I took.  Not sure If I really like the outcome but I don't dislike it either hahahaha.  Chocolate brown was used to as the contrasting colour for the flourishes, mount behind the sentiment, bow and Stickles.  I also added two bronze metal butterflies and a sweet wee shoe which sort of looks like a ballet pump.


Ingredients:-
  • Image - Do Your Own Thing by Lynne Stansbery
  • Colouring Medium - Promarkers
  • Dies - Marianne Designs Creatables Anjas Vintage Decoration, Spellbinders Ovals, Scalloped Ovals and Spellbinders Floral Flourishes
  • From my Stash - Stickles, metal butterflies, shoe charm, ribbon and lace
Thank you for stopping by today and hope you have a happy crafting time ahead of you :) xx

Sunday, March 8, 2015

Untouchable - Jane's view

Sweet Pea Stamps

Today is my day to showcase and image from Sweet Pea Stamps and I have chosen to work with the beautiful image 'Untouchable ' by Linda Biggs which is available from the Sweet Pea Store in both rubber and digi.


I am trying something a little different this time, printing on dark paper and colouring with my Faber-Castell - Polychromos colour pencils.  I printed the image four times just so I had a few spare copies to practice with lol.  Unfortunately the paper I have used which is a green/gold metallic type is not loving my camera at this point but I am sure you get the idea.

 Next I coloured the image.  I do love the vibrance of these pencils but have to admit they did not like my paper very much and blending was pretty hard.  Maybe I just need to practice some more to get the hang on it.
 I plan on a very straightforward card this time, concentrating on the image and then just the single colour of the paper.  Once the image was coloured I then cut it with a Spellbinder Oval die. Next I coloured some lace with my Promarkers to match up with the colour scheme,
 I then embossed and die cut another sheet of the green gold paper for the background of the card and finished off die cutting a flower with the same paper.  The die I used is a Marianne Craftables Flower.  I finished of with Olive stickles on the flower and around the edge of the card.
 For the inside I used more of the green/gold paper and added a soft mottled green paper for the writing area.  This was then embossed using the same embossing folder as for the front of the card.
 And here we have the finished creation.

Ingredients:-
  • Image - 'Untouchable ' by Linda Biggs
  • Colouring Medium - Faber-Castell - Polychromos colour pencils and Promarkers
  • Dies - Spellbinders Ovals and Marianne Craftables Flower
  • From my Stash - lace, brad and Stickles
Thank you for stopping by today and hope you have a happy crafting time ahead of you :) xx

Saturday, February 28, 2015

Featured Artists - Linda Biggs - Fairy Freak

Good Morning,

For todays inspirational post I've used the gorgeous Sweet Pea rubber stamp Fairy Freak by Linda Biggs.
She's also available as digi stamp
You can find the rubber stamp in shop HERE
the digi file HERE

Here's my card

EXTRA MATERIALS:
Cardstock black & smudged blue, 3d glitter paint, sentiment stamp, clear embossing powder, color pencils.

For the background I've used colors that are entirely different from the ones I've used to color the image, but I totaly like how this turned out.
The image realy pops off the background.

We have a verry nice and friendly group on facebook and we would love to see your make with any of the Sweet Pea Stamps.


I hope you enjoyed my project
See you again next week
Huggsss, Angelique