Showing posts with label Plate #106. Show all posts

Saturday, November 2, 2013

Weekly Cards/Creations by Kym

It is my turn to show you some of my cards/creations using Sweet Pea Stamps.
Here is a card I have used using a Sweet Pea Stamps image by Concetta Kilmer.  It is called "Mr and Mrs Christmas Sweets" and is available as a digital stamp or a single rubber stamp.
I have coloured the image in with my Promarkers, highlighted areas with my Sakura Stardust clear pens, inked around the edges with Tim Holtz's Peeled Paint and Pine Needles distress ink and decided that both owls needed googly eyes.  The backing papers I have given.  I have used a square Marianne Designs die and cut this out and inked with Peeled Paint and Pine Needles distress ink.  I have made two flowers using a patterned tissue paper and dies and held the layers together with some large brads.  I have finished the card off with some Marianne Designs die-cut holly, the berries for the holly I used a Sizzix die as I wanted to 3D the berries and a Craftwork Cards die-cut sentiment.
 *******************************
 
My second card uses an image by Joanne Schempp called "Guardian".  It is an available as a digital stamp, single rubber stamp and as part of a multi-image plate (Sheet 11, Plate 228 - Guardian comes on the multi-image sheet with Excalibur, Kazimira and Wild Thing).

I have coloured the image in with my Promarkers/Flexmarkers.  I then inked around the edge with Tim Holtz's Gathered Twigs distress ink (thanks to a fellow Design Team member Aletha using this distress ink I thought I'd give it a go - I love it!!!).  I then got a paint brush and wet around just over two sides of the card and then put on a bronze/gold effect Perfect Pearl powder to make it shine.  The backing papers are from my beloved Tim Holtz paper pad my son bought me some years ago - the papers are disappearing at quite a fast rate now!!!  I have finished the card off with my X-cut distressing tool pulling out strands of my cheesecloth material, spotty organza ribbon, Craftwork Cards die-cut sentiment, gems. feathers and some wooden hearts I have distressed with Tim Holtz's Gathered Twigs distress ink.
 *******************************
My final card for this week uses an image by Elaine Cox called "Midnight Rose".  This image is available as a digital stamp, single rubber stamp and as part of a multi-image plate (Sheet 17, Plate 106 - the image Midnight Rose comes on the multi-image plate with Stormy Moon, Celestia and Mariana).

I have coloured the image in with my Promarkers/Flexmarkers and added some sparkle with my clear Wink of Stella pen. The backing papers are from my Perfect Papercrafting Companions CD-Rom from Creative Crafting World and I have gone for a dusky pink and arctic blue colour scheme.  

I have finished the card off with some raffia ribbon, gathered lace underneath the image, flowers die-cut from felt, pearl brads, Craftwork Cards die-cut sentiment and some flat back pearls.

Thursday, October 3, 2013

Stormy Moon


There are so many gorgeous mermaid images available from Sweet Pea Stamps.  One of the amazing artists of mermaids is Elaine Cox and this one is called Stormy Moon.  She was a joy to color.
 
I am especially pleased with the sky background and how it turned out.  I did it a different way than I have tried before and just crossed my fingers.

You can get Stormy Moon in  red rubber HERE or digital HERE.

Get Inky!
Alex

Monday, December 3, 2012

Midnight Rose


This lovely lady is Midnight Rose by Elaine Cox.  I had this background paper from Teresa Collins on my scrap table and the image stamped out sitting in the same area.  I noticed the roses in both and knew it was a perfect match, as long as I could color the image correctly.  Very pleased with it and looking forward to sending this card to a friend in need of some 'happy mail'.

Get Inky!
Alex

Friday, December 30, 2011

Snap shots


Today I have a card I want to share that uses matted images (Elaine Cox's Mirima and Stormy Moon) that I like to call snap shots. Depending on your age, at one point in time or another you have either seen or even used an instant camera that would eject the picture out of the camera. You waited a short time and presto! Your picture was ready. While digitals have taken over the world, I still think an instant camera were marvelous creations - there is no need to run to a computer or kiosk to have it developed. But I digress...to create your own snap shots is very simple.

Cut a piece of white card stock to 3.5 x 4.5, this will be your mat.
For the stamped image you will need another piece of card stock, I want to say white since we are taking a picture, and cut it to 3 x 3.
Stamp and color the image.
Stamp a sentiment on the lower 1" section of the mat (for authenticity hand write it!).
Adhere the two pieces of paper together leaving a .25 border at the top and along the sides of the stamped image.

To finish up the card I am sharing today, I cut a 6 x 6 piece of Prima paper, inked the edges with some brown ink, flipped the Prima paper and cut it to 5.5" and inked those edges and attached the two pieces together, centering. Adhere the snapshots at angles, overlapping. Embellish with a Maya Road satin flower (something I will try and CASE for you sometime) and some Tattered Angels chipboard corners sprayed with a Walnut Gold Glimmer Mist.

Well, I hope you have enjoyed your stop today and will find yourself addicted to snap shots like I am! Don't forget to check out the great sale on grab bags in the Sweet Pea Stamps store! ttfn

Thursday, June 2, 2011

Stormy Moon

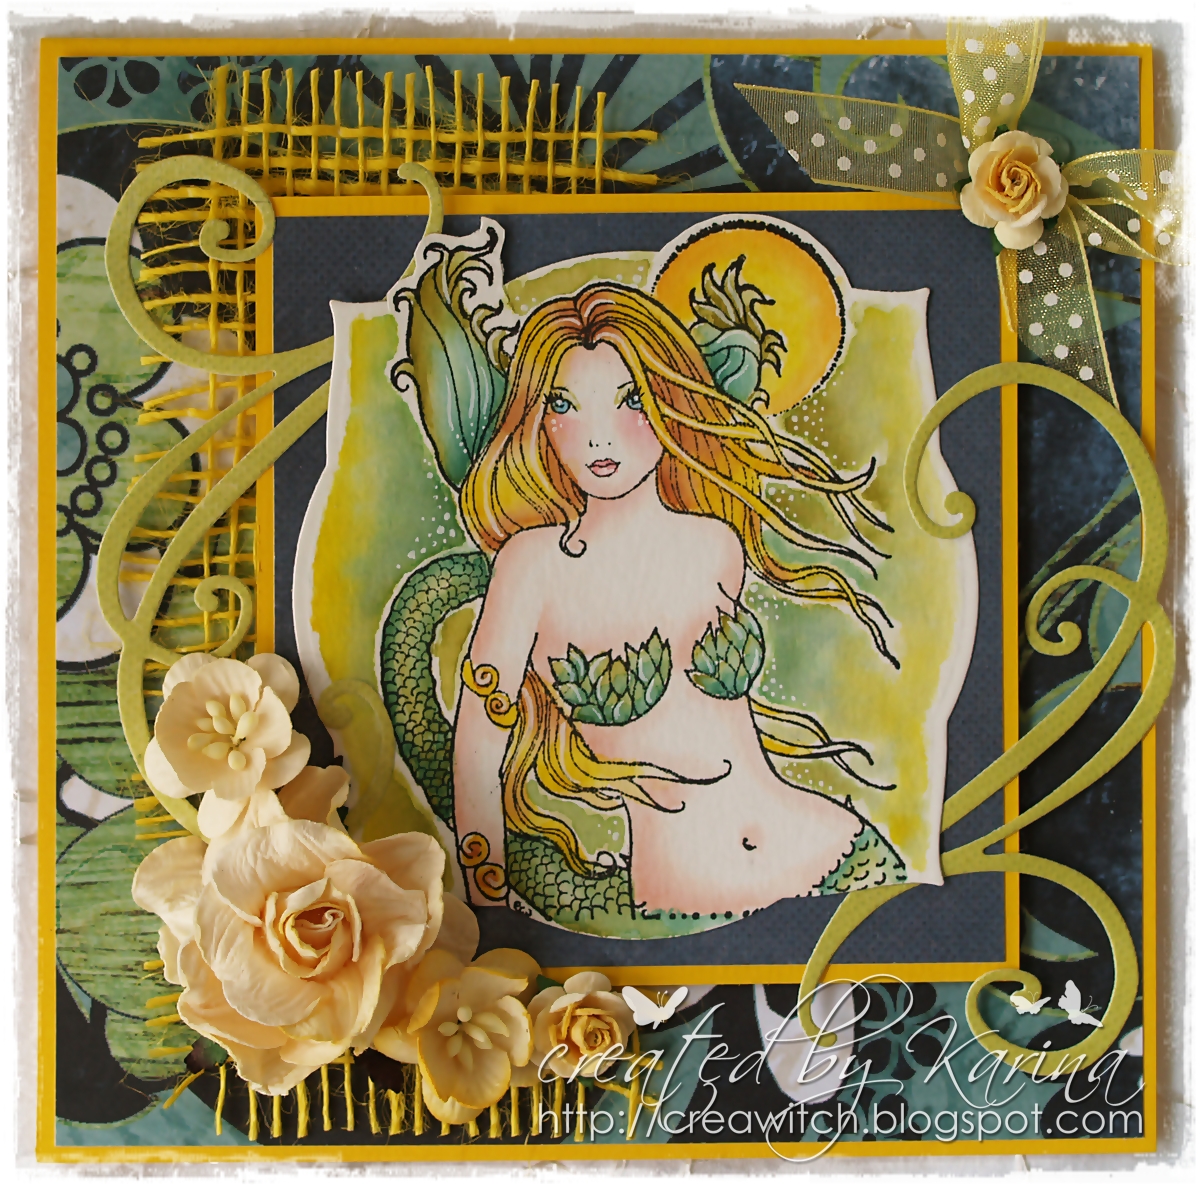
Hello creative peoples out there. Today I want to share I card I made with one of the amazing mermaids from the Elaine Cox Art Collection. This beauty is called Stormy Moon and is available on plate # 106 together with three more fabulous images, which is on Sale right now! You can get it as a single stamp as well.


I coloured her with Distress Inks on 300 gram watercolour paper. I love the combination of green and yellow.   I cannot remember what designer paper I used for the background. It was a scrap in the box I wanted to use and from what I thought would fit perfect to this image. You know, I always chose the papers first before I start colouring.

Wish everyone a happy day and thank you so much for looking. Always much appreciated.
Hugs, Karina

Thursday, March 24, 2011

Midnight Rose Fairy


This beauty is one of Elaine Cox's creations. She was a joy to ink up and create with! This entire sheet of stamps is stunning! You will want to check it out!

Supply List

Image
Midnight Rose by Elaine Cox for Sweet Pea Stamps

Papers
Neenah Smooth white card stock
Designer papers-unknown
Solid color card stock-Stampin Up
Metallic paper-my own creation
Navy Mulberry paper

Copic Markers
Skin Tones-yr0000, e000, yr000, e51
Hair-e41, e42, e43, e44
Eyes-b000, b00, b01, e13, y26
Dress-v91, v93, v95, v99
Wings-bv0000, b0000
Moon-b91, b93, b95, b97, 0
Roses-b37, b39, g64, g99
Outline shading-t1, t3, t5, t7, 0

Misc. Supplies:
Chalks for cheeks Scotch ATG gun and adhesive
Glitter wire, Recollections
Lavender and light blue felt/fleece
My Favorite Things "Die-namics" dies-rolled flowers (3 sizes)
Martha Stewart leaf punch
Diamond adhesive gems
Ranger Glossy Accents
Decoart fine glitter
Spellbinder/Nestability Die-Lg. Circle
Cuttlebug or Big Shot
Lisa

Sunday, January 30, 2011

For My Valentine

Today I have a special treat for you - this is one of the newest images by Elaine Cox called Celestia from plate 106. She was colored with copics, the paper and roses are from Martha Stewart. Currently this sheet is available for pre-order and will begin shipping February 7!