Friday, October 30, 2009

Go Team!

Gimme an "S" Gimme a "P", what does it stand for? Sweet Pea!!

I thought this was great timing for the cute cheerleader on sheet #16; Football season is in full gear and being here in Austin TX, all I hear is "football, football, football". I guess it helps that the UT Longhorns are in contention for the National Championship this year.

I stamped up this adorable little girl using Memento Ink onto white paper and used watercolor pencils to color her up. After trimming I inked the edges of the paper with ColorBox Chalk warm red ink. I mounted her on red paper on the corner of a large square card and then surrounded her with red flowers. I added a great sentiment from sheet 16.

Happy Friday everyone!

Thursday, October 29, 2009

Two More Days.....

You have two more days to vote on your favorite card, please vote. Cards are located on the right side of blog.

2 New Sheets of Designs


Here are two new sheets that are on a pre-order special. These are due in stock around Nov 20th. The first one is 6"x9", the second is 5" x 7". To order these you can purchase them here:

Join Sweet Pea at RSC

Yes, you will find Sweet Pea Stamps at the RubberStamp Chat online convention! Check out the great deals we are offering!

Wednesday, October 28, 2009

Birthday Banner

What little girl wouldn't love a banner like this for her birthday?? My niece, Alivia, will be 3 in December and I am ready.
I used an image from Sweet Pea plate #8 and one from plate #9.
Using purple and bright pink cardstock, I cut triangles and trimmed the edges with a decorative scissors. I cut 3 large from both colors of cardstock and 3 smaller from both. I used markers in coordinating colors to edge each of the triangles and then attached a small triangle onto each large triangle making sure I had one of each color for each of the 'flags'. I cut 2 slits in the tops of each flag and then threaded the decorative ribbon (purple with pink polka dots) through each alternating the colors of the flags. I punched the letters for Alivia's name using my Cuttlebug and the alphabet set I have. I used the same pink and purple cardstock alternating letters so that a pink letter would be attached to a purple flag and purple letter to a pink flag. I also used the Cuttlebug to punch and emboss 2 butterflies and 2 flowers. I stamped the Sweet Pea images onto white cardstock, colored with pencils, and cut them out. I attached the flowers with brads, and the butterflies and images with double sided tape. This was such an easy project and the images are perfect for little girls. I'm sure you know someone who would love a banner like this. Give this a try!! Chrissy

Tuesday, October 27, 2009

It's My Birthday and Ocean Fantasy

Have you seen them? Have you seen the new release? Just in case you missed the release party and the multiple postings with the reveals, I am sharing just two of the new stamps.
We are so pleased to announce the exclusive licensing of the very talented artist ching-chou kuik.


Monday, October 26, 2009

Our guest designer, Micki Harper brings us

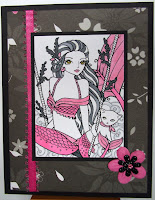
one more delightful creation using a mermaid image from plate #3.

We have enjoyed having Micki design for us this month and are sure we will see more of her in the near future! Thank you Micki for all your creative submissions!

We are always looking for artwork to feature on the blog and website. Please email submissions to: Jennifer.

Saturday, October 24, 2009

Playing with clay

Getting ready for the Holidays, these are two of the projects I have made for gifts.


This 'Roman Artifact' pendant was made using Sweet Pea Plate number 6 and Sculpey Clay. It is a quick and easy project to make as a gift for that special person. Full directions can be found at Stamper's Quest.


Another fun project to make is the Mermaid in the Shell, also made with Sculpey, Sweet Pea Plate number 1 and an assortment of treasures it is sure to please the toughest recipients. Directions can be found here.

Friday, October 23, 2009

Introducing: Dragonfly Fantasy


Introducing: Bamboo Serenade


Introducing: It's My Birthday


Introducing: Dark Royalty


Introducing: Faraway Moon


I have been playing with the moon sea fairy today and I had sooo much fun! I just fell more and more in love with the image while colouring her. Can't wait to play with the other ones! I know it's kind of cliché using greens and blues for a mermaid card, but I had the perfect papers for this. I wanted the image to stand out as much as possible so I didn't overwhelm the card by adding embellishments, rather kept it clean and simple. I used white bling cardstock that I embossed with my Cuttlebug and just two patterned papers.

To make the moon shine I used a white twinkling H2O after shading it a bit with a blue Promarker. I also used the twinkling H2O on her eyelids, lips and tail.


Promarkers: ivory, marsh green, lime green, apple, pastel green, pastel blue, turquoise, pastel pink, cinnamon, burnt sienna, umber and blender.


/Katarina

Introducing: Winterberry


Introducing: Ocean Fantasy


Introducing: Merry Season


Angel's Wings

Even though this stamp is on the Christmas plate, I think it works beautifully in a non-Christmas card. I paired the angel stamp on Plate #12 with one of the beautiful sayings from Plate #17.


I stamped both the image and the saying on white cardstock with Memento ink. Using Copic markers I colored in the Angel's face and hands (E00) and the angel's hair (E33/35). I trimmed both the images for mounting on Bazzill cardstock with shimmery mica bronze paper in the background and a beautiful sewn border on kraft paper.

Have a wonderful Friday! Don't forget the Reveal Party tonight!

Thursday, October 22, 2009

Connie-Sweet Pea Halloween

I've been picking pumpkins from my garden so of course I have pumpkins on my mind....
Supplies:
Sweet Pea Stamps plate #13 "Vertical Sayings"
Sweet Pea Stamps "Halloween Plate #1"
Cuttlebug embossing folder "Pumpkin Harvest"
sheer black ribbon-unknown
Memento "Tuxedo Black" dye ink by Tsukineko
Copic markers

Directions:
1) Stamp verse in black dye ink onto orange cardstock & emboss with pumpkin embossing folder
2) Affix sheer black ribbon along right edge of orange panel & layer onto black and then orange base
3) Stamp pumpkin images on white cardstock, color and cut out
4) Layer pumpkin images on ribbon with pop dots

Enough pumpkins yet??

Connie-Sweet Pea Cheer

This Sweet Pea cheerleader is saying "Cheer Up"!

Supplies:
Sweet Pea Stamps Plate #16 "Sports Hayden"
Sheer white 7/8" ribbon "Offray"
White & Turquoise cardstock-unknown
Background paper-"Generations Stackers"
Black dye ink-Memento "Tuxedo Black" by Tsukineko
Copic markers

Directions:
1) Stamp Hayden image on white cardstock and color with Copic markers
2) Trim image and layer on turquoise panel and then onto white panel
3) Adhere sheer ribbon onto decorative strip before affixing onto base
4) Stamp saying in bottom right corner with black ink

**TIP** You can color match your ribbon by going over it with a Copic marker as I did

Wednesday, October 21, 2009

Flu season remedies....

Cold and flu season is upon us, so I thought I'd stock up on Get Well cards. I'm hoping no one gets sick, but if someone does ... I'm ready!
I've had a booklet of patterned paper forever and thought it would work great for some get well wishes.
On the left I used an image and phrase from Sweet Pea plate #10. I simply stamped them on a piece of patterned paper that I trimmed with decorative edge scissors and then attached to a blue card. The card still needed something else so I doodled along the left and right edges with a marker, and I also applied tinted crystal lacquer for the little girl's hair.
For the card on the right I stamped an image from Sweet Pea plate #9 on the left side of a bright pink card. I cut a triangle from patterned paper, stamped 2 phrases from Sweet Pea plate #10 onto it, and then attached to the pink card using pink brads. To add a little more interest I attached a piece of pink thread around the brads before gluing the patterned piece onto the pink card. I seemed to be in a 'doodling' mood that day so I used a marker to add some to the left and bottom edge of this card too.
These 2 cards use the bug image and one of the phrases from Sweet Pea plate #10.
On the right I stamped the bug onto a piece of patterned paper, cut with decorative scissors and attached to the bright pink card. I stamped the phrase and added doodles down the left and right side using a marker. And then I added the ribbon bow.
On the left I stamped the bug on a piece of white cardstock, colored with pencils, cut out, and attached to a piece of patterned paper. I used a deckle edge ruler to tear the patterned paper and then attached to the yellow card. I stamped the phrase in the lower right corner and added doodles using a marker along the right and bottom of the yellow card. There still seemed to be something missing so I attached yellow ribbon along the left and top side of the card and then attached 3 rhinestone embellishments in the corners.
Try these images to make your own Get Well Cards.... Keep Stamping, Chrissy

Tuesday, October 20, 2009

Ready for Halloween?


I just had to play with this adorable little witch before Halloween was over. I am pretty sure that in a couple of weeks I will have a 10 year old boy in my house cradling a candy filled pumpkin and smiling from ear to ear as well!

Monday, October 19, 2009

Our guest designer, Micki, continues to inspire us...

Using plate #10 she has created two adorable cards for us this week!

If you would like to see more of Micki's work she can be found at Artful Xpressions.

We are always looking for artwork to feature on the blog and website. Please email submissions to: Jennifer.

Saturday, October 17, 2009

Sweet (Pea) Christmas


I needed a break from studying today so I made a Christmas card for you. I have used both stamps from the Holiday sheet #12. The middle one is the angel as you can see and the other two are from the botanical one.

I cut out the images with my nesties and coloured them slightly with my Promarkers. I then gold-edged them and attached them to a bigger shape. The scalloped edge is made by cutting three different papers with scalloped edge scissors. I glued them together and mounted them on a brown piece of cardstock, glued on a piece of sheer ribbon and finally glued it all to a blue card.
Simple as that!

I'm very happy with this card since it's not what I usually do. It's not my colours at all, but I'm glad I could pull it off anyway. Hope you got inspired that you don't have to use the whole stamp, just parts of it to make a great card.


Thanks for stopping by today.
/Katarina

Halloween Party Hat


This hat was made with the same theme as the party banner featured August 29. The hat's decoration is an extra triangle left from the banner as are the stamped images from Sweet Pea Stamps Halloween plate.

To create the hat attach an 11" string to a pencil. Hold the string with one hand at the mid point of the top of the 12"x12" sheet of printed paper. Mimicking the motion of a pendulum, allow the pencil to make a light mark on the paper and trim along the line.

Roll the paper up and adhere along the open edges.

Attach the triangle to the front of the hat with black brads and decorate with the stamped images.

Run ribbons through the top point of the hat if desired.

Enjoy sharing!

Friday, October 16, 2009

Lollipop, Lollipop!

Lollipop, Lollipop, oh lolli-lolli-lolli, Lollipop!

Here's a cute little Halloween project for you to make, decorated lollipops! You can use any store bought sucker you like, the flat ones work best. These treats are a great handout for friends, family, and those cute Trick-or-Treaters.


Here's a basic template that you can use to make these cute decorated candies:


1) Cut a strip of paper that is 2.5" wide by 6.5" long.

2) Punch three small holes as shown, one at the top, one at the bottom, and one in the middle.

3) Score the card three inches from the top and three inches from the bottom.

4) Fold the scores edges up, forming a tent.

5) Create a decorated image 3"x2.5" using your Sweet Pea Stamps, Cardstock, and Halloween embellishments.

Note: this project can be used for any season or occasion to turn a plain lollipop into a cute handmade treat. Just change your images/decorations.

6) Adhere the Decorated images to the front (and back if you desire) of the lollipop.

7) Insert the lollipop in to the holder.

8) Use any number of methods to secure the two open holes (now they are both at the top) together. You can use a brad (as shown in the sample), a ribbon, decorated paper clip or even staples.

9) Present your lollipop to the people at the office or the kids at Halloween.


Depending on the size of your lollipops, you may need to change the dimensions of the template to accommodate your candy. The 3" size is based on the height of the lollipop, including the wrapper. The 0.5" measurement is the thickness of the lollipop; 0.5" works well for flat style lollipops. If you are using something more rounded, like a Tootsie Pop or Blo-Pop, you should increase this measurement. Finally the 2.5" measurement is the width of the lollipop, including it's wrapper.

Project Materials: White cardstock, hole puncher, Sweet Pea Stamps (for the examples, all images are from the Halloween Sheet), flat lollipops, decorative brads, Bazzill Cardstock, Memento Ink, Derwent Inktense Pencils, adhesives

Trick or Treat!

Holley

Thursday, October 15, 2009

Connie-Havin' Fun?


This card was done with images from Sweet Pea Stamps Plate #5

Supplies:
Sweet Pea Stamps Plate #5
Black Memento dye ink (Tsukineko)
Encore Blue Metallic pigment ink (Tsukineko)
Oval cutting system (Creative Memories)
Stipple brushes (Judi-Kins)
Removable adhesive
Blue, black & white cardstock (stash)
Copic Markers

Directions:

1) Stamp the lady with black ink on white cardstock, mask with oval shape
2) Stamp upper portion of small dragonfly around mask for frame, keeping it as even as possible
3) Stipple blue ink around mask, lighter as you go outward
4) Stamp dragonfly with blue ink here and there
5) Remove mask and color image with Copic markers
6) Layer on black panel and on blue base card

*You can make your "frame" with any image you like, keeping just a bit part showing for a great look*
Connie

Connie-Christmas Music

It's not too early to get a start on your Christmas cards and Sweet Pea images make it a breeze!

Supplies:

Sweet Pea Stamps plates #12 and #13
Designer paper (Daisy D's "Paisley Sugarplum")
Deckle scissors (Fiskar)
VersaMark (Tsukineko)
Detail Black Embossing Powder (Judi-Kins)
Markers (Stampin' Up!)
White, black, red cardstock (unknown)
Double stick tape (Scotch)

Directions:

I stamped image on white cs with black dye ink and colored holly with markers, trimmed with deckle scissors, layered on red panel and black panel. Both panels were torn on one side.
I layered designer paper and red panels (torn along one edge) on white base and stamped words with black dye ink along right side.

Connie

Wednesday, October 14, 2009

Birthday wishes


Why not use an image from plate #14 to wish someone special a Happy Birthday???

I used my Cuttlebug "birthday" embossing folder for both of these cards. On the left I used a piece cut from Core'dinations paper. This particular piece is from the 'Whitewash' collection and is white on one side and lime green on the other. After running the piece of cardstock through the cuttlebug, I sanded on the white side so that the green would show through. I mounted the embossed piece onto a lime green card using 4 green brads. I stamped the Sweet Pea image using black India ink onto lime green cardstock, cut the image into a rectangular shape, and used a ticket punch on all four corners. I attached that stamped piece onto the front of the card and also attached the decorative flower trim across the top left corner of the card.

For the card on the right I used the Cuttlebug "birthday" embossing folder with a piece of yellow cardstock. Before attaching the yellow embossed cardstock to the green card, I inserted a star-shaped yellow ribbon brad to the left side of the piece. I inserted a rainbow colored ribbon through the brad and snipped both ends of the ribbon. I stamped the Sweet Pea image onto yellow cardstock with black India ink. After trimming the piece and using a ticket punch on all four corners of the yellow piece, I mounted it onto a slightly larger piece of green cardstock. The mounted image was then attached to the right side of the card.

The uses for this image are endless. Let's see what you can come up with!!! Chrissy

Monday, October 12, 2009

Please welcome Micki Harper....

our guest designer for October. Micki was gracious enough to share a bit about herself:


Hi, my name is Michaela Harper but everyone calls me “Micki”. I was born and raised in Bad Hersfeld, Germany and immigrated to the United States in 1977. I am married to Chriss who is my biggest supporter, have a 26 year old daughter, Rachelle; an awesome son-in-law, Kyle and two awesome, beautiful granddaughters, Emma & Gracy. Having been raised in Germany, I‘ve always been exposed to all sorts of crafts. However, scrapbooking didn‘t catch my fancy. I even dabbled in stamping 15 years ago, but at that time that “bug” didn‘t catch my fancy either (Gasp, imagine that, lol).

I have been stamping and scrapbooking for 3 years. I don‘t have that natural “knack” for art, be it stamping/scrapbooking or photography but I am persistent and keep at it. It‘s fun for me to look back at some of my first card creations, comparing them with a recent project and realizing how my crafting has evolved. I tend to create with the ‘less is more’ philosophy but force myself to step outside of my comfort zone and try new styles as I appreciate any crafting style and find inspiration from just about anything.
I am so happy to have found and follow Lynette’s blog. I enjoy seeing each participants ‘take’ of the weekly images. Ideas always start to pop up after visiting the blog. A big thank you to Lynette for having me as a guest designer.
Micki's chose Plate # 10 for her designs:


Check back next week for of Micki's creations as she continues her guest designer position! If you would like to be considered for a future guest designer position please keep an eye out for future calls. If you would like your artwork featured on any given Monday, please email your Sweet Pea Stamps creation to Jennifer!

Sunday, October 11, 2009

Happy Birthday from Olivia


This time I have been working with Molly's younger sister Olivia from the Gumdrop Gang (that is on sale by the way).

I have coloured her with my beloved Promarkers as usual. The text is from plate #9 - the Sweet Pea Pals. I have inked it with a rainbow pad and embossed it with a glittery powder. I inked the edges of the panel with pink ink from the same pad. The patterned papers are mounted on different coloured cardstock as you can see. Olivia is mounted on a lilac bling cardstock.

Simple, yet effective :)


/Katarina